Soft, delicious sugar cookies decorated with homemade royal icing — just like grandma made them! Absolutely perfect for the holiday season, this Christmas sugar cookie recipe has been passed down through the generations in my family, and I can't wait to share it with you.
These are simply delightful cookies that I made with my granddaughter last night, thank you so much for sharing such a simple, but satisfying recipe. ★★★★★
-Jacky
There's nothing quite like freshly-baked Christmas cookies, is there?
Every year when Christmas rolls around, I pull out the tiny index card that contains my grandma's handwritten Christmas sugar cookie recipe. It's covered in flour and a bit hard to decipher, but it's my favorite recipe to make each and every holiday season.
And personally, one of my favorite parts about recipes is how they can transcend generations. I will always feel a connection to my dad (and my grandmother) when I make these cookies, and I hope to one day share them with my children as well.
I hope you get as much joy from my Grandma's Christmas Sugar Cookies as my family has throughout the years!
Jump to:
What You'll Need
Here's a quick overview of some of the ingredients and tools needed to make these cookies. The full recipe can be found at the bottom of the post!
Ingredients
- Unsalted butter - You'll want to use unsalted butter (rather than salted) in this recipe so you can control the amount of salt in the cookies.
- Eggs & egg whites - We'll use whole eggs in the cookie dough and egg whites for the royal icing. Be sure to use pasteurized egg whites for the icing!
- Whole milk - I prefer to use whole milk, but 2% or skim milk would also work well. I haven't tried making this recipe using plant-based milk, so I wouldn't recommend that.
- All-purpose flour - Be sure to use the spoon & level method when measuring out the flour.
- Powdered sugar - Be sure to sift it first to avoid any clumps.
- Water - This will help thin out the royal icing.
Equipment
- Mixer - Personally, I like to use a stand mixer fitted with a paddle attachment for this recipe. However, an electric hand mixer will also work.
- Rolling pin - You can use any rolling pin you'd like, but I prefer to use a French rolling pin because it helps ensure that you roll the dough out evenly.
- Christmas cookie cutters - I've gathered my collection of cookie cutters over the years, but if you don't have any of your own, these Christmas cookie cutters from Amazon are a good option.
- Baking sheet - This recipe calls for 2 baking sheets.
- Piping bag - I like to keep a stash of these disposable piping bags in my pantry at all times.
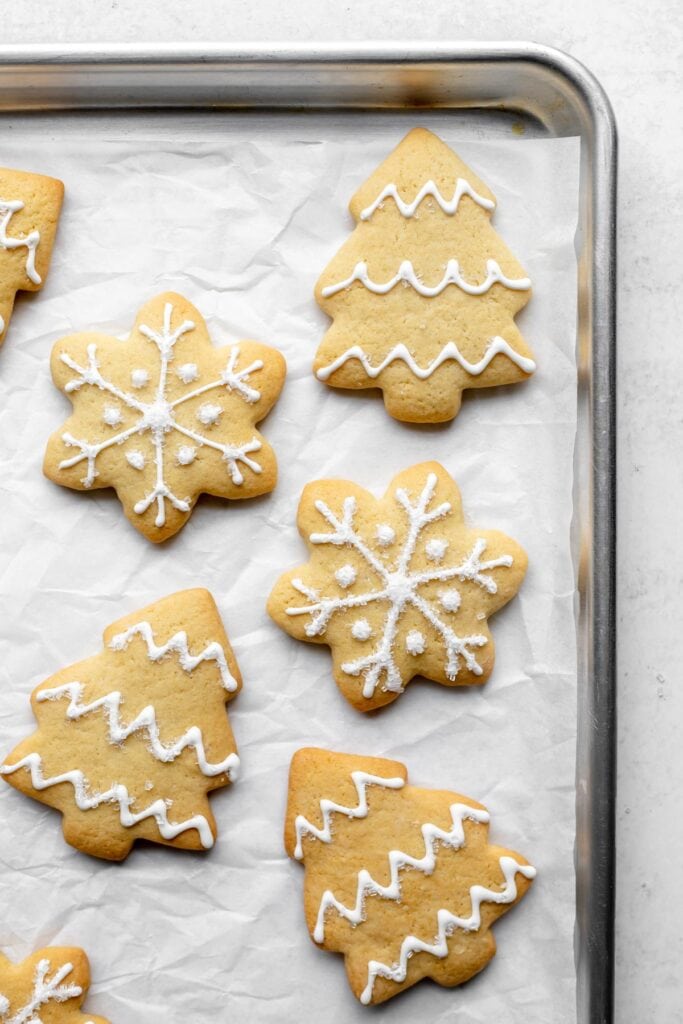
How to Make These Cookies
We'll start by making the sugar cookies, and then once they're baked, you can enjoy them as is or decorate them with royal icing!
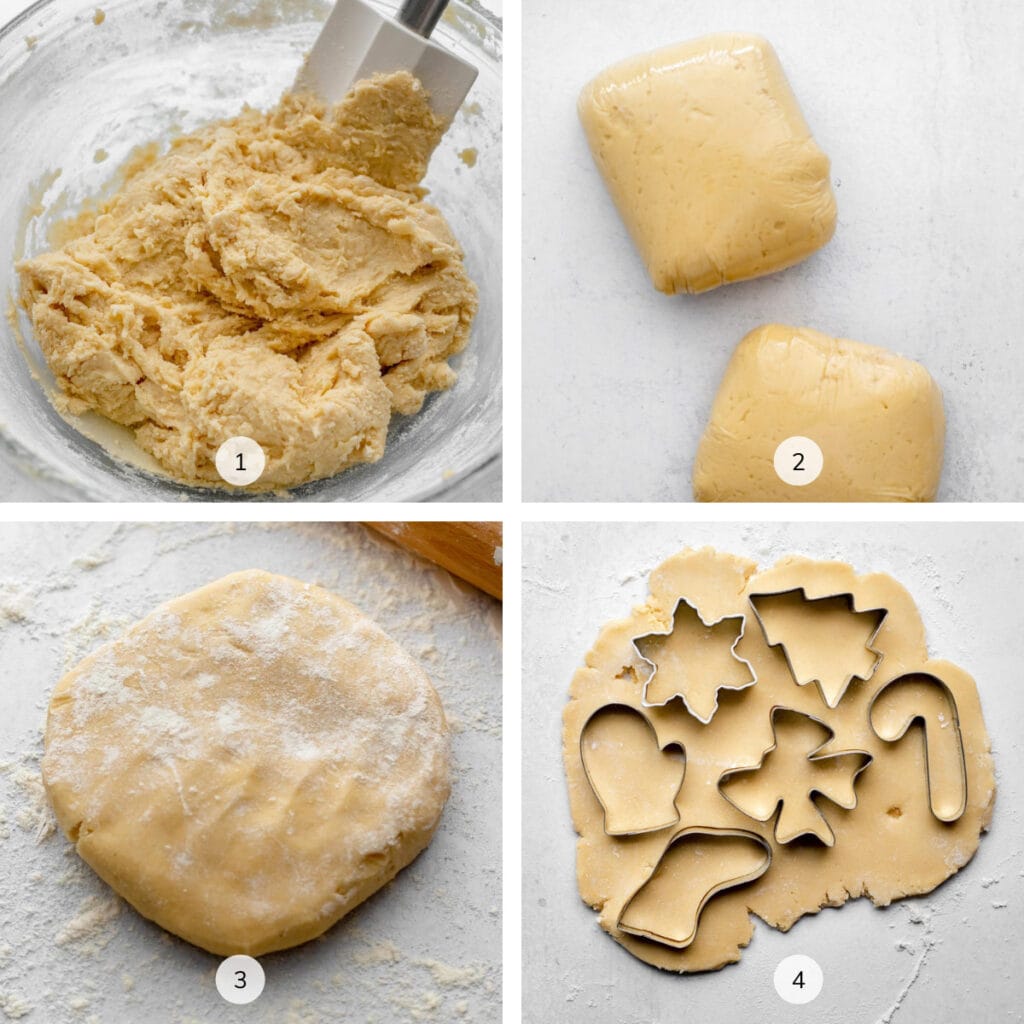
1. Make the sugar cookie dough. Start by mixing together all the wet ingredients, then add in the dry ingredients until just combined. It's okay if the dough seems sticky at this point — it will firm up in the fridge. (Image 1)
2. Chill the dough. Wrap the dough in plastic wrap and refrigerate for at least 30 minutes. This lets the dough firm up, which makes it easier to roll out later. You can even refrigerate the dough overnight if you want to make the cookies in stages. (Image 2)
3. Roll out the dough and bake. Roll out the dough to ¼-inch thickness (Image 3), then cut the dough out using your desired cookie cutters. (Image 4) Transfer the cookies to a baking sheet, then bake for 8-12 minutes at 350°F, or until the edges are a light golden brown.
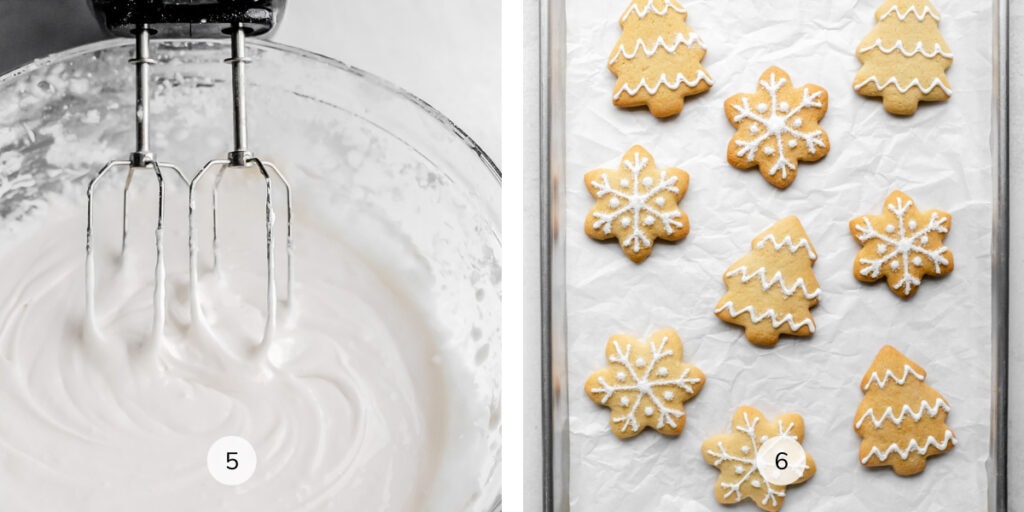
4. Make the royal icing. Whisk the pasteurized egg whites until light and foamy, then gradually add in the powdered sugar. Add in the water one teaspoon at a time until you can make a figure eight with the icing that disappears in eight seconds. You want the icing to be stiff enough to pipe, but not too runny. (Image 5)
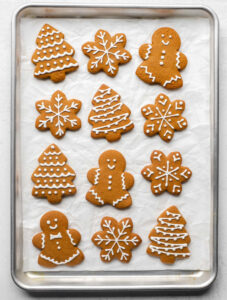
5. Decorate. Color the royal icing with food coloring if desired, then divide the royal icing into piping bags. Have fun decorating the cookies! (Image 6)
Tips to Make Perfect Cookies
These cookies are pretty simple to make, and the fun part is definitely the decorating. Here are a few tips to keep in mind when making them:
- Make sure to use softened butter (not melted). When mixing together the butter and sugar, make sure your butter is just a little bit soft. If the butter has melted, the dough will be too soft, and you will have to refrigerate the dough for a longer period of time. If it's coming straight from the fridge, I like to warm my butter up in the microwave in 15-second increments until it is ready.
- Make sure to refrigerate the cookie dough before rolling it out. This lets the dough firm up, which makes it easier to roll out later. You can even refrigerate the dough overnight if you want to make the cookies in stages.
- Flour your surface well so that the dough doesn’t stick. Honestly, is there anything worse than cookies that won’t come off the counter? I will usually re-roll the dough once or twice, and I recommend flouring the surface well in between each roll.
- Use the figure-eight test to see when the royal icing is ready. After making the royal icing, make a figure eight in the icing with a spoon, and if it disappears within 8 seconds, the icing is ready to go. If the icing is too stiff, you can add in some water a teaspoon at a time. If it's too loose, you can sprinkle in small amounts of powdered sugar until you reach the desired consistency.

Common Questions About These Cookies
These are some questions I frequently hear about this recipe. If you have a question that isn't answered below, feel free to leave it in the comments.
Absolutely! I personally love to make these cookies in a few stages so that I'm not too overwhelmed all in one day. You can make the dough, then tightly wrap it and refrigerate it for up to two days. Alternatively, you can freeze the dough for up to 2 months — just let it thaw to room temperature before rolling it out.
Yes, you can double (and even triple) this recipe with ease. If doing so, I would recommend separating the cookie dough into a few circular disks before refrigerating it. You will also want to roll the dough out in stages so that it's easier to handle.
First off, make sure to use softened butter, not melted! If the butter has melted, the dough will be too soft and you will have to refrigerate it for a longer period of time. Then, don't skip the refrigeration time for the dough. This lets the dough firm up, which makes it easier to roll out later. Finally, make sure to flour your surface well so that the dough doesn't stick.
How to Store & Freeze
To store: You can store the cookies in an airtight container for up to one week.
To freeze: Baked cookies can be frozen for up to 2 months. Wrap them in plastic wrap and place them in a frozen-safe zip-top bag before freezing. You can also freeze the cookie dough for up to 2 months. Just be sure to let it thaw to room temperature before rolling it out and baking.
Love this recipe? Please leave a star rating and review in the comments below! And don't forget to subscribe to The Baker's Almanac for even more baking recipes and tips.
Print
Grandma's Christmas Sugar Cookies
- Total Time: 50 minutes
- Yield: 24 3-inch cookies 1x
Description
Soft, delicious sugar cookies decorated with homemade royal icing — just like grandma made them! Absolutely perfect for the holiday season, this Christmas sugar cookie recipe has been passed down through the generations in my family, and I can't wait to share it with you.
Ingredients
Sugar Cookies:
- ½ cup (113g) unsalted butter, softened
- 1 cup (200g) granulated sugar
- 2 eggs (100g), well beaten
- 1 teaspoon vanilla extract
- 1 tablespoon whole milk
- 2 ½ cups (300g) all-purpose flour
- 1 teaspoon baking powder
- ½ teaspoon baking soda
- ½ teaspoon salt
Royal Icing:
- 2 pasteurized egg whites (60g)
- 1 teaspoon vanilla extract
- 3 cups (340g) powdered sugar, sifted
- 1 tablespoon water
- Optional: a few drops of food coloring
Instructions
Sugar Cookies:
- Preheat the oven to 350°F (177°C). Line a sheet tray with parchment paper or a silicone baking mat.
- In a stand mixer fitted with a paddle attachment (or a large bowl with a hand mixer), cream together the softened butter and granulated sugar until fluffy, about 3-5 minutes. Add in the beaten eggs, vanilla extract, and milk and mix well to combine, scraping the bowl well after each addition.
- In a separate large bowl, whisk together the all-purpose flour, baking powder, baking soda, and salt. Add the dry ingredients to the wet ingredients and mix until just combined, scraping as needed.
- Tightly wrap the cookie dough in plastic wrap, then refrigerate for at least 30 minutes before rolling it out.
- After the dough has chilled, lightly flour your countertop and roll the cookie dough out to about a ¼-inch thickness. Cut out the cookies using your desired cookie cutters, then transfer them to the prepared baking sheet.
- Bake the cookies in the preheated oven for 8-12 minutes, or until they are lightly golden brown around the edges.
- Let the cookies cool on the baking sheet for 5 minutes before transferring them to a wire rack to cool completely. Make sure the cookies are completely cool before decorating.
Royal Icing:
- In a stand mixer fitted with a whisk attachment (or a large bowl with a handheld mixer), whisk together the egg whites and vanilla extract until white and foamy, then gradually add in the powdered sugar until the mixture forms stiff peaks. Finally, add in water one teaspoon at a time until you can make a figure eight with the icing that disappears in eight seconds.
- If desired, color the royal icing with food coloring, then transfer the royal icing to a piping bag and decorate the cooled cookies.
- Make sure to let the royal icing dry completely before serving, then store the cookies in an airtight container at room temperature for up to a week.
Notes
- Yield: The number of cookies that this recipe yields depends on the size of the cookie cutter you use.
- Make Ahead Instructions: If you'd like to prepare the dough ahead of time, you can refrigerate it for up to 2 days or freeze it for up to 2 months. You can also freeze the baked cookies for up to 2 months — just let them thaw to room temperature before serving.
- Storage: Stored in an airtight container, these cookies will usually last for about a week at room temperature.
- Prep Time: 10 minutes
- Chill Time: 30 minutes
- Cook Time: 10 minutes
- Category: Dessert
- Method: Bake
- Cuisine: American













These are simply delightful cookies that I made with my granddaughter last night, thank you so much for sharing such a simple, but satisfying recipe. Merry Christmas💕
I'm so glad you both enjoyed the recipe, Jacky! I'm definitely going to be whipping up a few batches of these cookies this week. 😊
Thanks so much Leslie for such a good breakdown of your grandma's cookie rec, along with the royal icing rec. I am a 75 year old grandma myself as of Dec.18th. I love baking and trying diff. cookie rec's. Good luck with everything you do my darling.
Thank you so much, Sharlene! If you give the recipe a try, definitely let me know what you think. 😊
I am so excited to find your site. I am an avid Baker, however, very new to decorating. I found and printed your fruit pairing guide and it has helped me tremendously. I also noticed that most of the time when I'm looking for tips, techniques, and guides, almost everyone charges.(which can be understandable) But you offer so much to the beginner and that is very much appreciated!!! I can't wait to try this recipe.
Thanks so much for your kind words, Jaime! Here at The Baker's Almanac, I try to provide as many baking tips and recipes as I can for free to help bakers level up their skills. Let me know what you think if you give the recipe a try! 😊
Yummy recipe. Made them for a family dinner and they were a hit. Will be bookmarking to make again.
Thanks for giving the recipe a try and leaving a review, Wyatt!
Grandma Hargett would be very honored (and proud).
I hope so!