

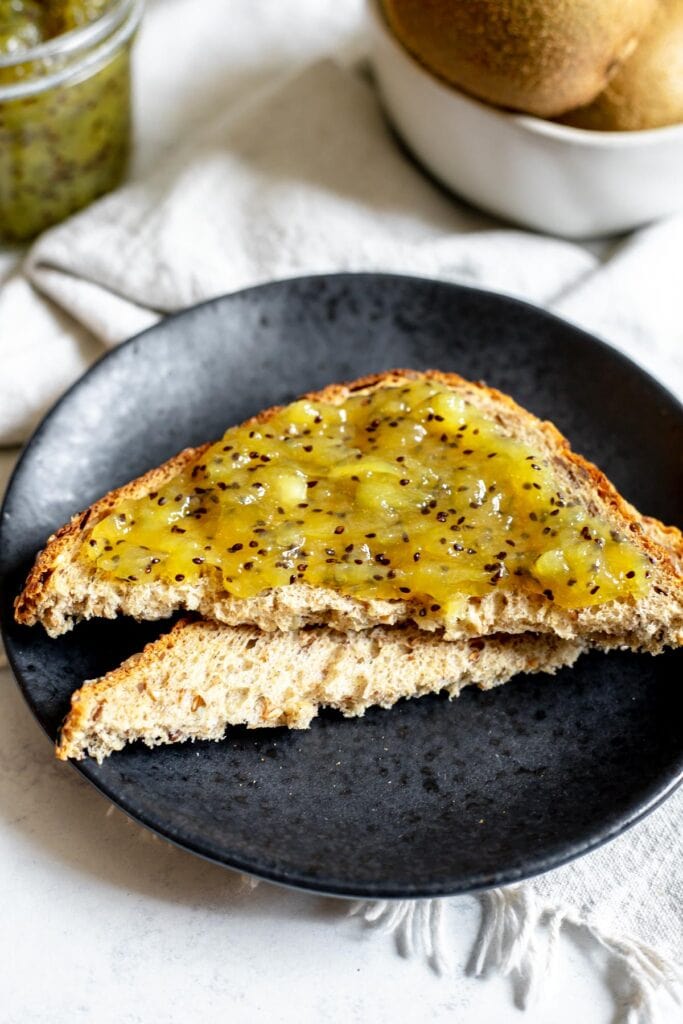
Delicious, tangy Homemade Kiwi Jam made with just four ingredients! Enjoy this jam by itself or on top of a piece of toast for a delicious breakfast.
I liked this recipe. It's sweet, but not too sweet. I used yellow kiwis with red centers and it turned out lovely. ★★★★★
-Sandy

Move over, Smucker's — we're making jam at home today. And even better, it's homemade kiwi jam!
For a few years now, I have been obsessed with making jam at home (and if you don't believe me, please see case study one and case study two for further proof).
Making jam from scratch is so much easier than you would think, and it's 10x more delicious than anything you can find in the grocery store.
And though I've shared several jam recipes with you on The Baker's Almanac, I wanted to switch things up today and try out a new jam recipe featuring kiwis!
Jump to:
Ingredient Rundown
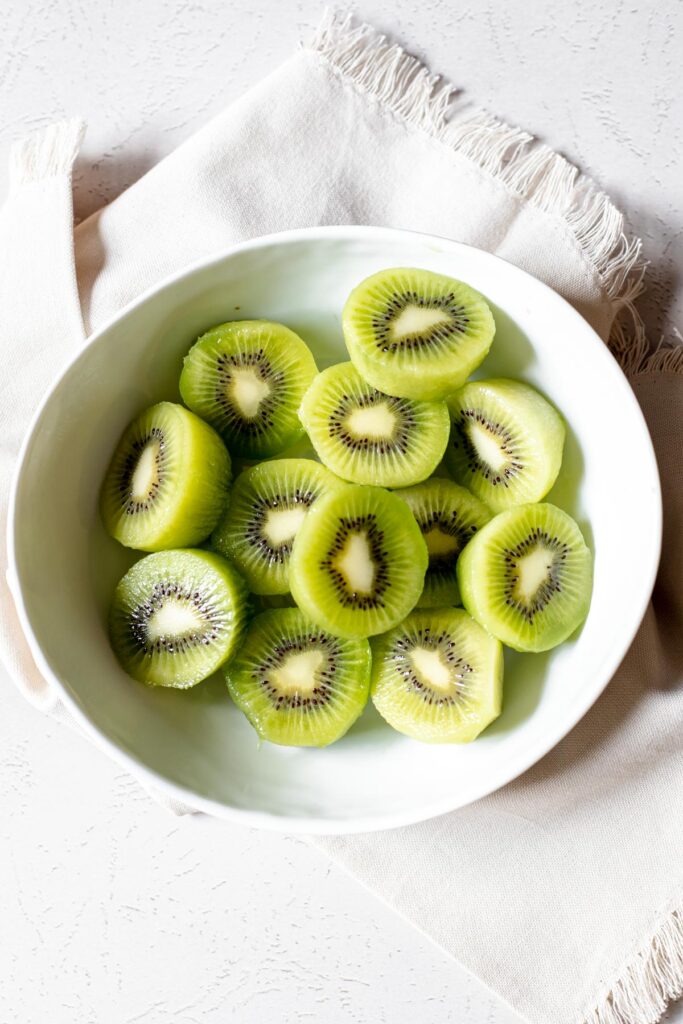
Kiwis. The star of the show in this recipe! I used six kiwis when making this jam, and I chopped them into fine pieces before adding them to the pot. The finer you chop them, the more smooth the jam mixture will be.
Granulated sugar. This recipe calls for quite a bit of sugar, but it's definitely essential. It both helps the jam set and keeps bacteria away from the mixture. Talk about a win-win!
Lemon juice. I always like to include a bit of lemon juice in my jam recipes because it adds a bit of acidity to the mixture and helps cut the sweetness of the fruit and sugar.
Kosher salt. Last but not least, don't forget a pinch of kosher salt. You don't need much, but it helps create a more rich, distinct flavor profile for the jam.
Tips for Making This Jam
Use an immersion blender if you'd prefer a smoother jam. While the jam is cooking, you can blend the mixture with an immersion blender (or even a potato masher) to create a smoother texture. Totally optional — just depends on how you like your jam.
While the jam is cooking, stir frequently with a heatproof spatula. As the jam cooks in the pot, it can easily start to burn on the bottom. By stirring the jam frequently, you help distribute it evenly throughout the pot and prevent any burning.
Make this jam in small amounts. When it comes to making jam, I don't recommend doubling or tripling the recipe. If you try and make too much jam at once, it's easy for the fruit to overcook. Instead, I recommend making the jam in several batches if you want a large amount.
Common Questions About This Jam
When I first started making jam, I overcooked it over and over again. Keep in mind that the jam will continue to thicken up once you take it off the heat! I can usually tell that the jam is ready once it starts to stick to the bottom of the pot. You can also try putting a spoon or lid in the freezer, then dropping some of the jam on it. Run your finger or another utensil through the jam, and if the jam wrinkles, it’s usually ready. If you're interested, this video shows this process in more detail.
Stored in an airtight container in the fridge, this jam will usually last up to two months. This time will vary, so keep an eye on it—you should toss the jam if you start seeing any mold growing on the top.
Love this recipe? Please leave a star rating and review in the comments below! And don't forget to subscribe to The Baker's Almanac for even more baking recipes and tips.
Print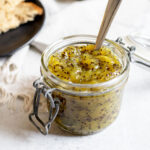
Homemade Kiwi Jam
- Total Time: 25 minutes
- Yield: 12 ounces 1x
Description
Delicious, tangy Homemade Kiwi Jam made with just four ingredients! Enjoy this jam by itself or on top of a piece of toast for a delicious breakfast.
Ingredients
- 6 kiwis (475g), peeled and finely chopped
- ¾ cup (150g) granulated sugar
- 1 teaspoon (5g) lemon juice
- Pinch of kosher salt (1g)
Instructions
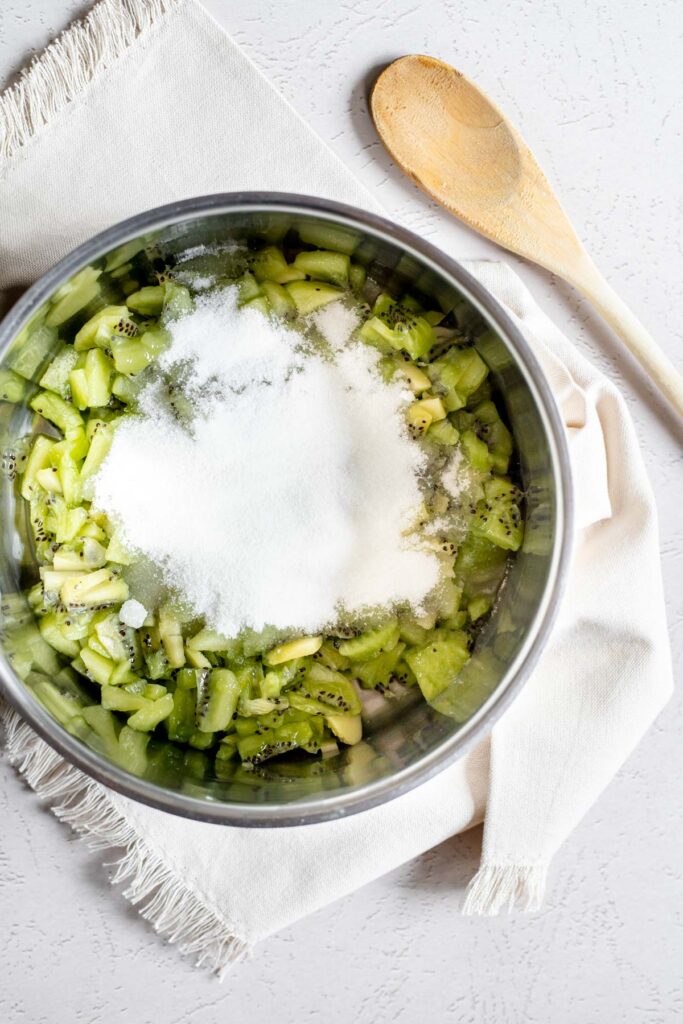
- In a medium pot, combine kiwis, granulated sugar, lemon juice, and kosher salt. Heat mixture over high heat, stirring constantly with a heat-proof spatula. Once the mixture starts to bubble up, reduce the heat down to medium-low.
- Cook the mixture for 10-15 minutes, stirring constantly until the jam is thick and viscous. To test if the jam is ready, I usually like to run my spatula along the bottom of the pot in a straight line. If it takes more than a second for the line to fill back up, the jam is usually ready. I like to err on the side of caution and take the jam off almost too early—if it's not done yet, you can always return it back to the heat.
- Once ready, remove the pot from the heat and transfer the jam to a heatproof container. Let the jam cool completely at room temperature, then transfer to the fridge.
- Stored properly in an airtight container in the fridge, this jam will usually last for two months.
Notes
- Be careful not to overcook the jam or it will set too hard! Remember that the jam will continue to cook once you take it off the heat, so you just want to remove it once it starts to thicken.
- If you'd prefer a smoother texture for your jam, you can blend it with an immersion blender while it's cooking to break the chunks of kiwi up.
- I always like to make my jam in smaller amounts so that it doesn’t spoil. You can even cut this recipe in half if you want a smaller amount of jam.
- Prep Time: 10 minutes
- Cook Time: 15 minutes
- Category: Jam
- Method: Sauté
- Cuisine: American
Do I peel the kiwi before cooking?
Yes, I peeled the kiwi before cooking! I'll add this to the instructions so it's more clear in the recipe.
Amazing! I added a teaspoon of fresh grated ginger and a little grated apple for the pectin. As soon as it cools down, I’m making a smoothie with Greek yogurt. I also plan to top cream cheese on an English muffin!
I'm so glad you enjoyed the recipe, Peter! That all sounds so delicious.
I halved the recipe since I only had three kiwi fruits, but I just can't seem to get it to thicken? do I need to ad more sugar or??
Hi, Evan! I'm sorry you had issues getting the jam to thicken. I'd recommend reboiling it and adding in a bit more lemon juice and a teaspoon or two of sugar. Let me know if that works!
I made this recipe using the new ruby red kiwi fruits and I have to say as a first time jam maker I found this wonderful to follow. Thank you!
I'm so glad you enjoyed the recipe and found it easy to follow! Thanks so much for taking the time to leave a review.
I am Diabetic, can I use an artificial sweetener?
The sugar in this recipe acts as a preservative, so without it, the jam will spoil within a couple of days of opening, even if refrigerated. I would recommend trying out a kiwi fruit chia seed jam recipe instead such as this one since jams with chia seeds don't need sugar. I hope that helps!
Hi Leslie,
I live in South Africa and here we have plenty of fruit.
I made your Kiwi Jam recipe and added chilies and lime juice.
This goes very well with a cheese platter and is something different.
Happy Jam cooking,
Carol Gentry.
Hi, Carol! I'm so glad to hear you enjoyed the recipe. I wish I could have a bite of it with your cheese platter — that all sounds delicious!
Can I waterbath this recipe for longer shelf life?
Yes, you absolutely can! I would recommend following these instructions. I hope that helps!
how much time should the jars stay in the boiling water bath.
Hi, Shelly! It depends on how large your jars are. This article has some great instructions and walks you through how long to boil the jars for depending on the size. I hope that helps!
Thank you for the recipe. I’m in SC and have a Kiwi bush. It is loaded and the season for Kiwi is short, so mine do not ripen in the vine before it frost. I pick and either put in refrigerator or leave setting out. Slowly ripen.
That's a great tip, Joan! Thanks so much for taking the time to leave a comment. I hope you enjoy the recipe!
this sounds amazing. How much chilli and lime juice did you add?
thanks for the recipe! i had to add some pectin as the jam wouldn’t thicken on the stove. also, you don’t mention needing to sterilize the container and leave it in a water bath?
Hi, Angelie! Thanks for the note. I'll take a look at the recipe and see if I need to add some pectin in, and I will add a note about sterilizing the container. I hope you enjoy the jam!
It always disturbs me, when people refer to this fruit as a Kiwi. It is a kiwi fruit. A Kiwi is a bird which lives in New Zealand and is not to be chopped up and turned into Jam.
Hi, Helen — thanks so much for your comment. That's such an important point, and I appreciate you making the distinction. Where I live in the United States, people typically refer to this fruit as just 'kiwi,' so that's why I named this recipe as such. But I will aim to call it kiwi fruit from now on to avoid any confusion!
Hi. If we are going to be fastidious about the name we give this fruit let’s go back to before the New Zealanders hijack it and call it Chinese Gooseberry. Being in England I’ll stick to kiwi as I harvest a bumper crop on a plant I grew from a seed over 35 years ago. I look forward to trying this recipe for which I thank you.
This was super easy and super delicious!!! Everyone loved it save for my autistic grandson who said "yuck! I'm not trying that, it looks gross" it's a visual/sensory thing with him. But hands down my new obsession. It's great on everything.
I'm so glad you enjoyed the recipe, Wendy! Thanks for taking the time to leave a review.
I used: 5 kiwis, 1/2 cup of chopped frozen pineapple,1 small apple chopped (for the pectin in the apple), 1/3 c of turbinado sugar and a pinch of kosher salt. I cooked it on stove, mashing it with the potato masher a few times as it cooked, stirring frequently until is was thickened. Then I finished it off with the immersion blender, let it cool, then spread on my home made sourdough bread. It was delicious, thanks for the inspiration to combine kiwi and pineapple as you did in other recipes.
That sounds delicious, Deborah! And I bet it goes so well with homemade sourdough bread.
I liked this recipe. It's sweet, but not too sweet. I used yellow kiwis with red centers and it turned out lovely.
I'm glad you enjoyed the jam, Sandy! Thanks so much for leaving a review. 🙂