

Welcome back to another addition in my pastry school recap series! I recently graduated from pastry school at The International Culinary Center, and I am sharing all about my experience here on The Baker’s Almanac. If you missed the first few recaps, make sure to check out the links below to get caught up.
Chocolate 1
After wrapping up the exhausting midterm, we moved on to our first chocolate unit. For the first time in pastry school, the pace slowed down a bit as we weren't churning out numerous baked goods a day.
Before we could go any further, we first had to learn how to temper chocolate. Tempering chocolate is a process in which you melt, cool, and then handle chocolate to allow beta crystals to form. Tempered chocolate is shiny, snaps easily, and has a smooth design, making it ideal for use in pastry.
There are a few different methods to temper chocolate, but we mostly focused on the seeding method at ICC. To do this method, you first melt the chocolate entirely, then cool it down to a particular temperature (the temperature varies depending on the type of chocolate). Then, you add in small pieces of chocolate (called seed) to the melted chocolate. Once you reach the desired temperature, you have to test the chocolate to ensure that it is in temper.
To be honest, I found this entire process a bit challenging. A few times, I would do this entire process only to realize I didn't temper the chocolate correctly. Frustrated, I would have to start all over again. However, I felt like I had at least a base-level understanding of tempering chocolate by the end of the unit.
Throughout this chocolate unit, we made several delicious confections such as mendiants (chocolate disks topped with nuts and dried fruits) and chocolate-covered nuts.

Mendiants
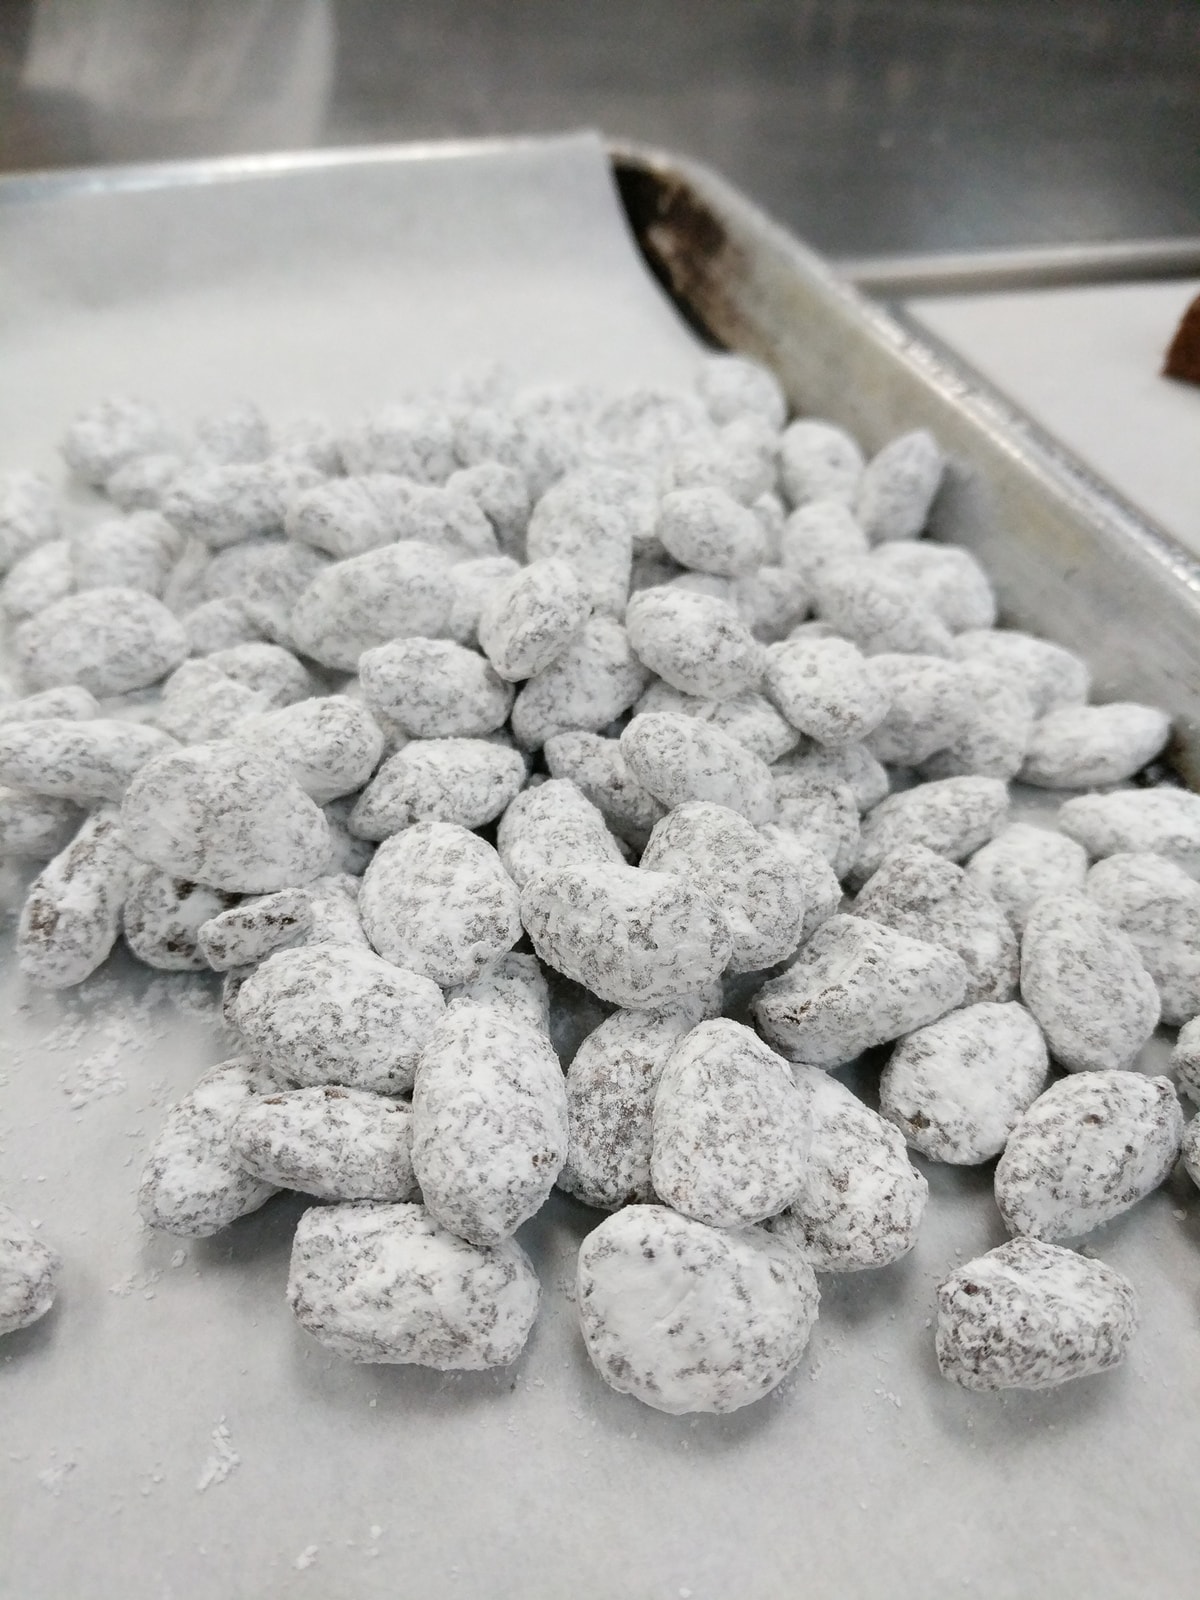
Chocolate covered almonds
We also even learned how to use tempered chocolate to build structures! One class, we used a template to construct a box out of tempered chocolate, and we topped the boxes with chocolate bows. Once finished, we displayed chocolate truffles in the box (do you think that's enough chocolate for one person?).
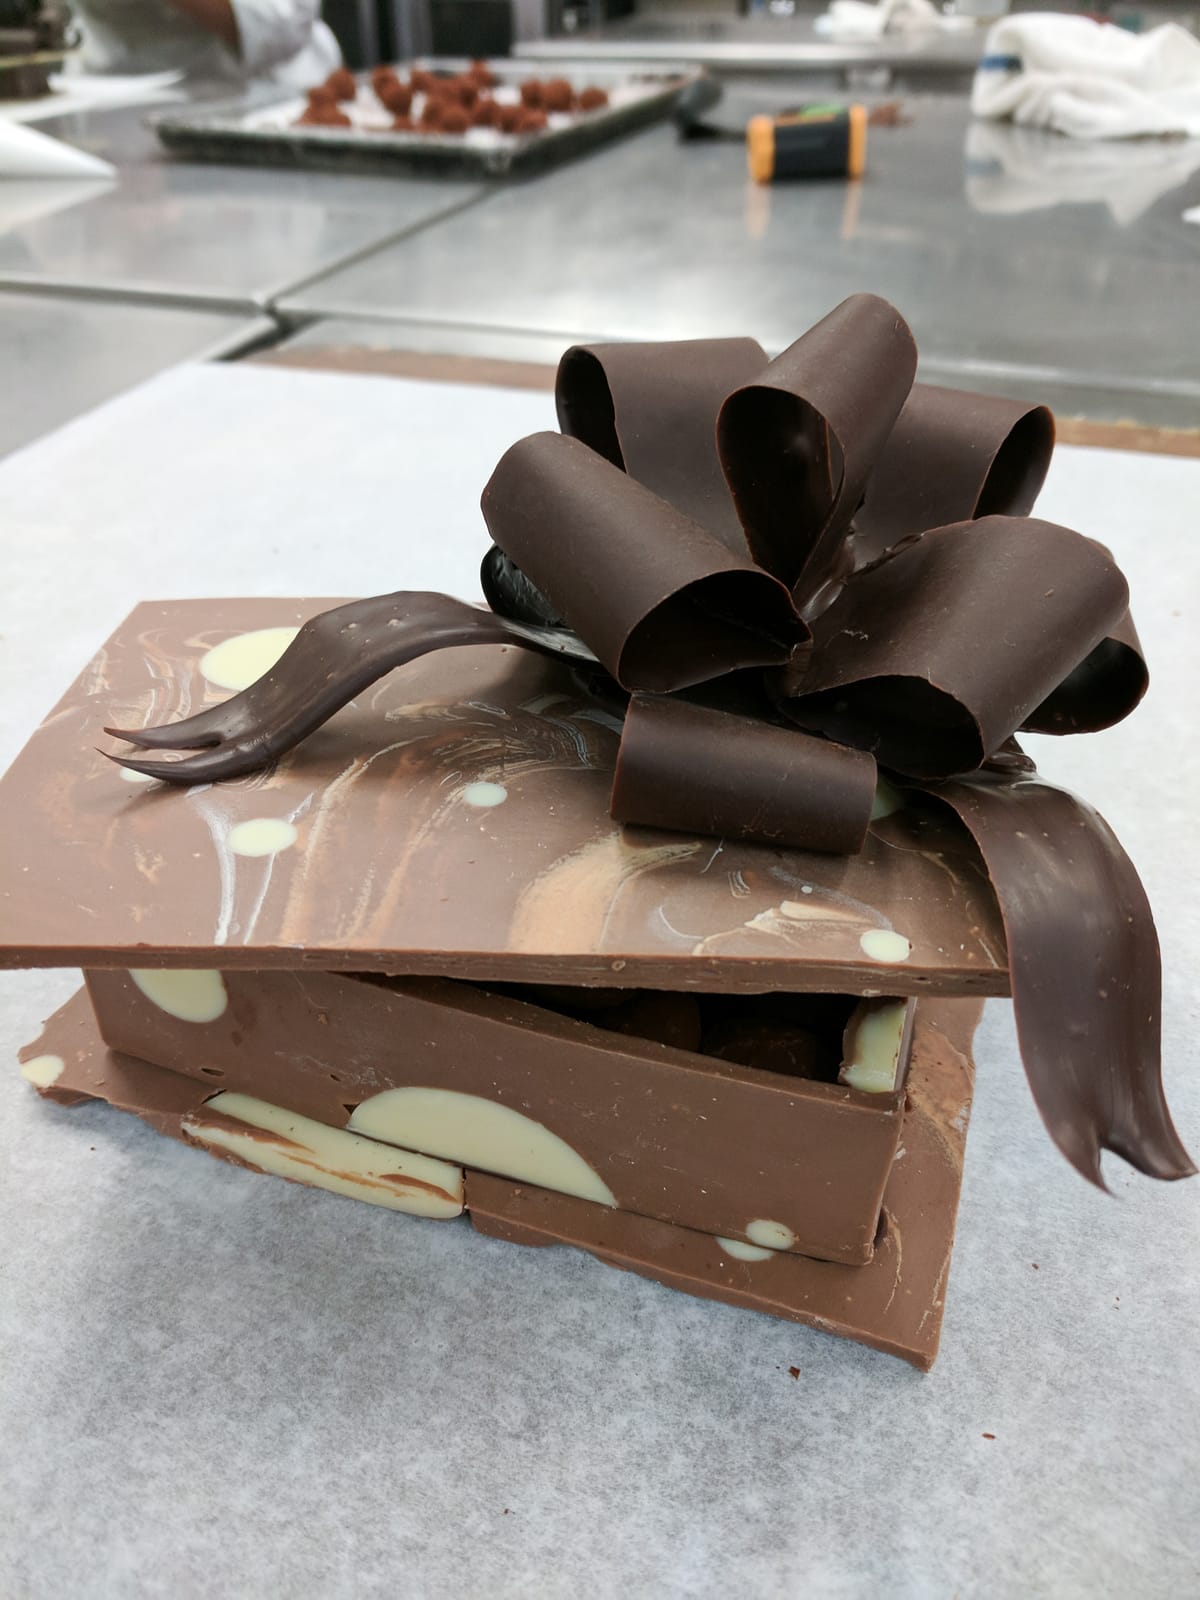
Chocolate box

Chocolate box filled with chocolate truffles
Towards the end of the unit, we had to make our first (out of many) showpieces. We were instructed to build a chocolate candy stand that could support itself, as well as hold various chocolate candies. This showpiece took two days to make, and it was quite a stressful experience. In the end, though, I loved how mine turned out! It even sat in the display case at school for a week or two, so it was neat to look at as I walked by.
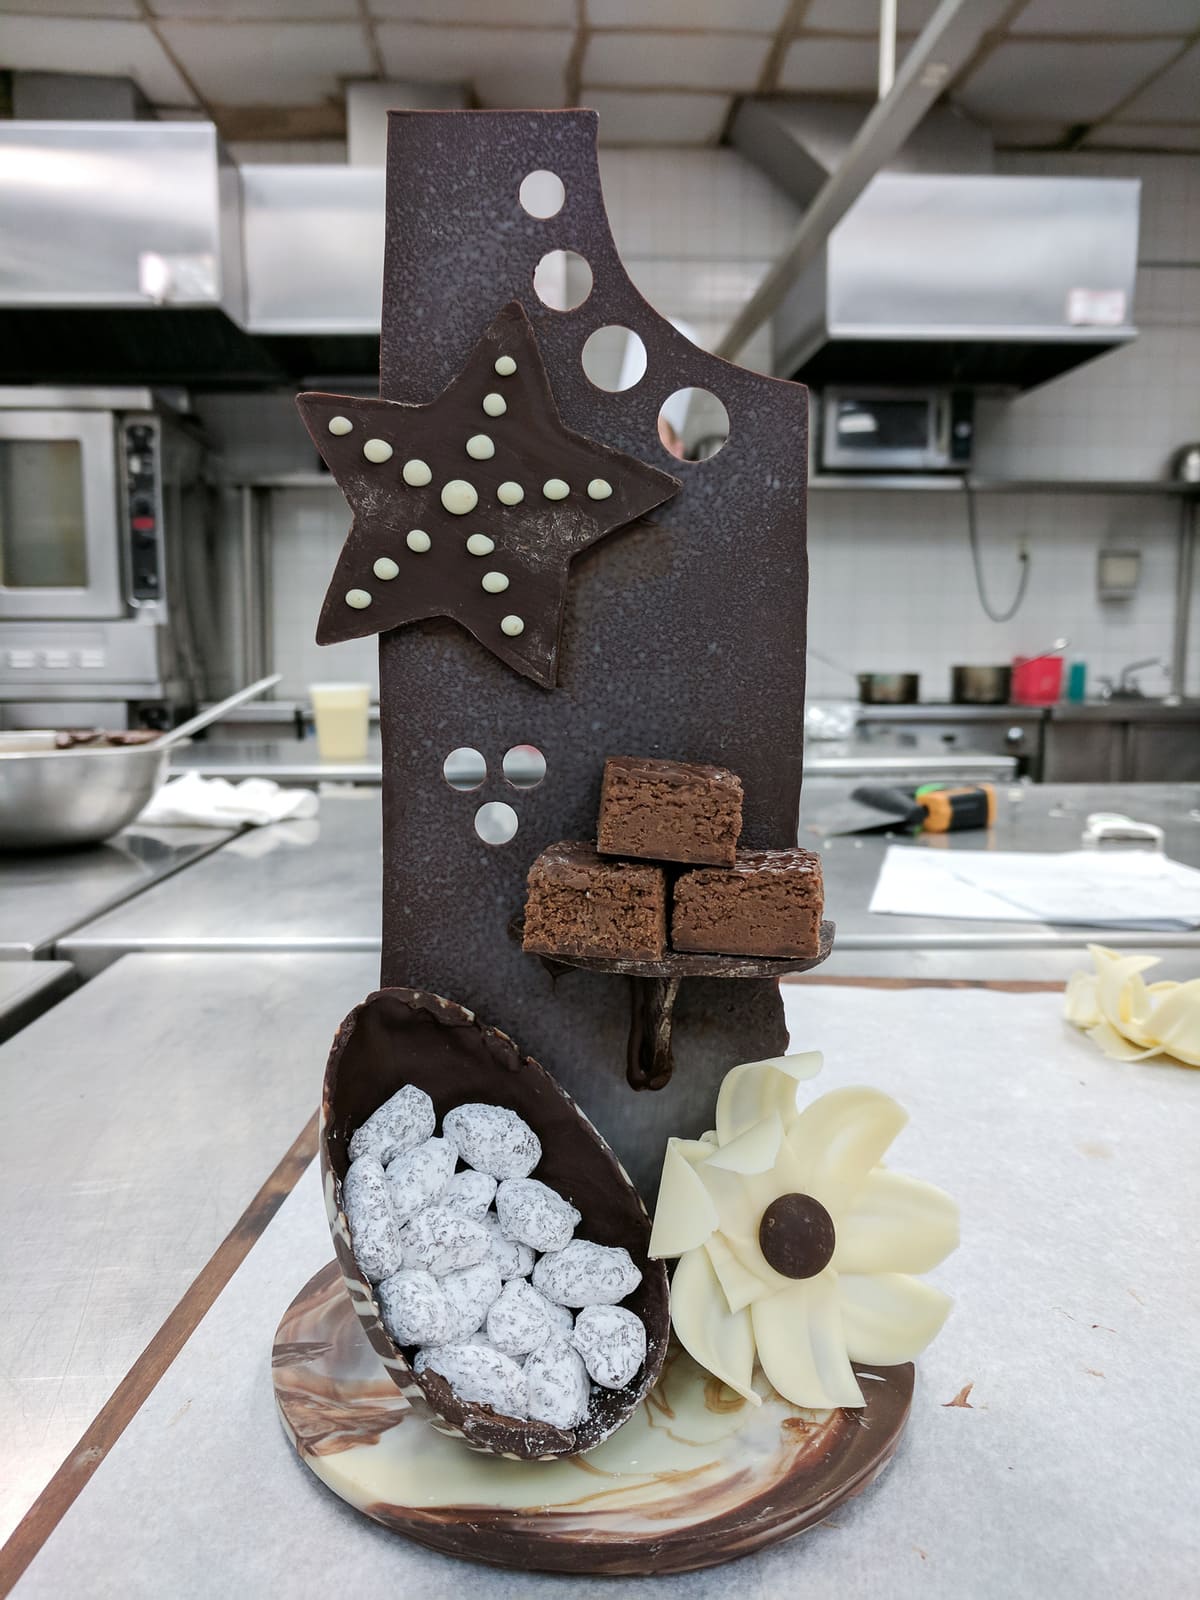
Chocolate candy stand
Before moving onto the next unit, we had practical and written exams. We each had to bake a reine de saba cake and make tempered chocolate cutouts to go around the sides, as well as a chocolate bow on top. After making this cake, I felt relieved to leave chocolate behind for a little while!
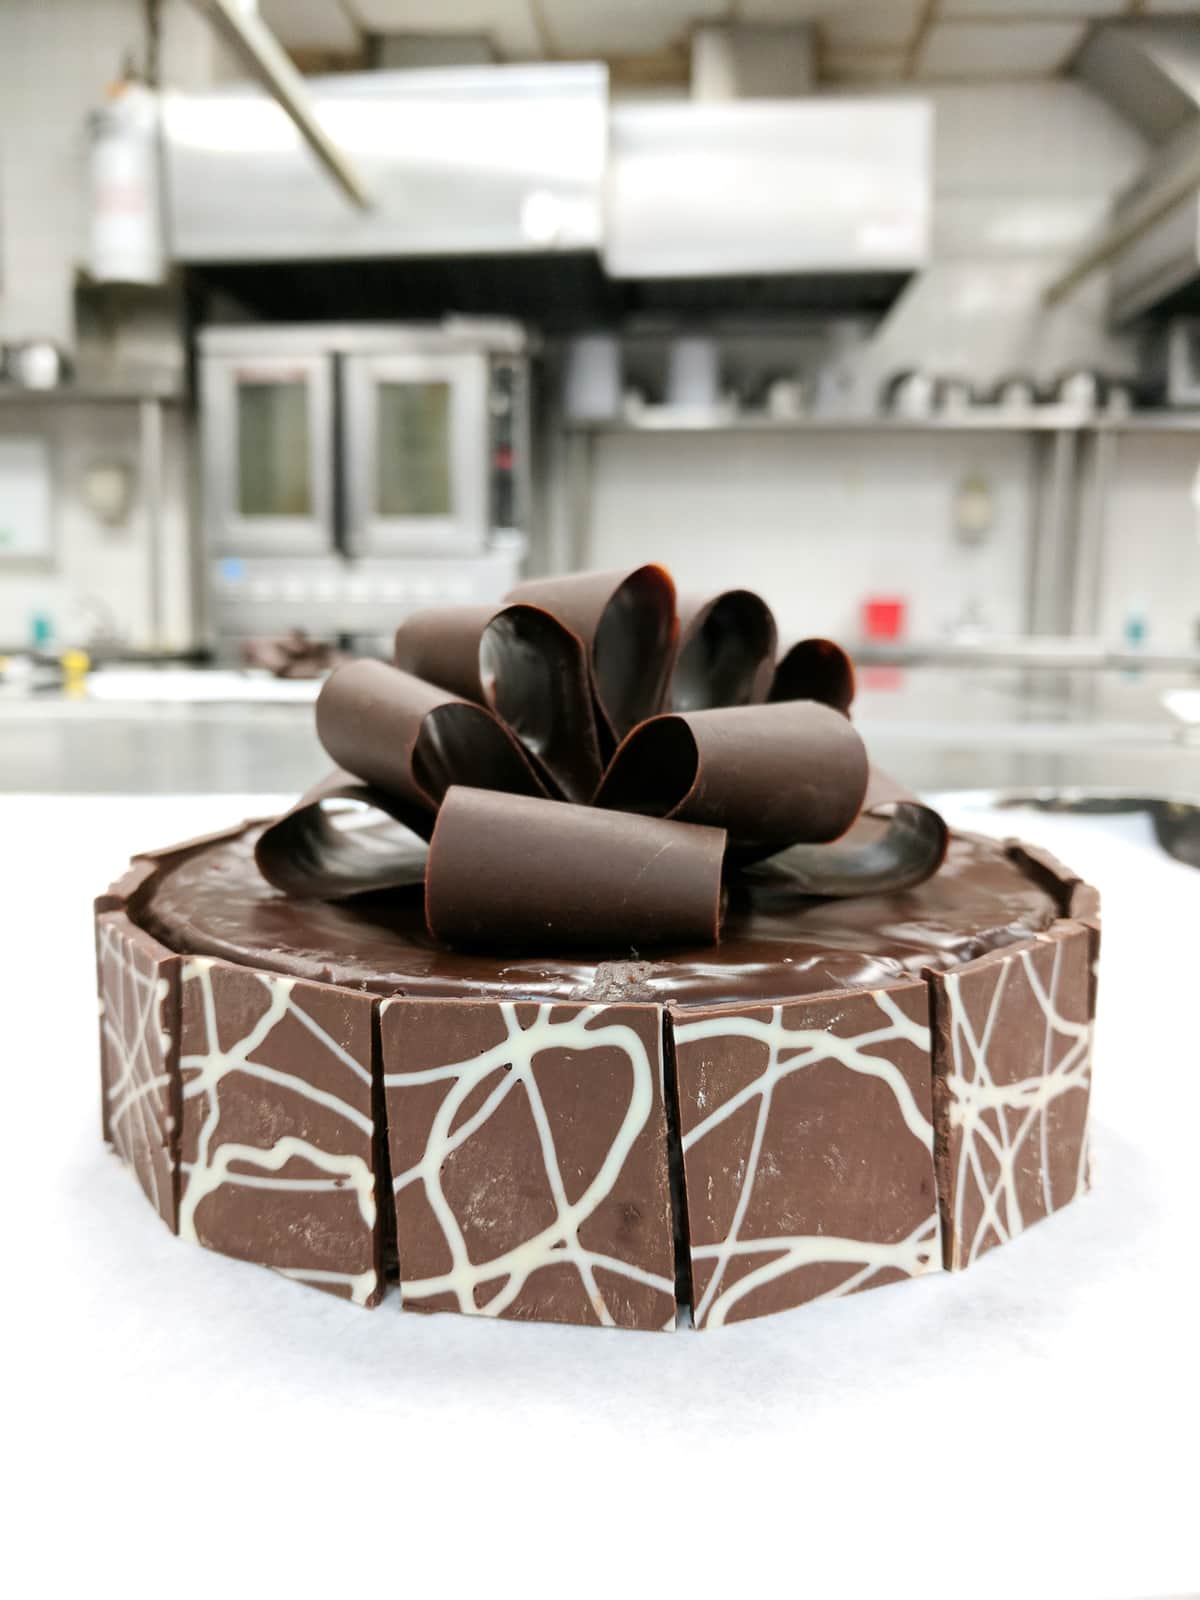
Reine de saba cake
Individual Desserts 1
Moving on from chocolate, we started our first unit on individual desserts. I had been looking forward to this section for a long time, and it did not disappoint!
During this unit, we made so many desserts that it was a bit overwhelming to eat them all. We started off making different kinds of custards, such as crème brûlée and clafoutis.
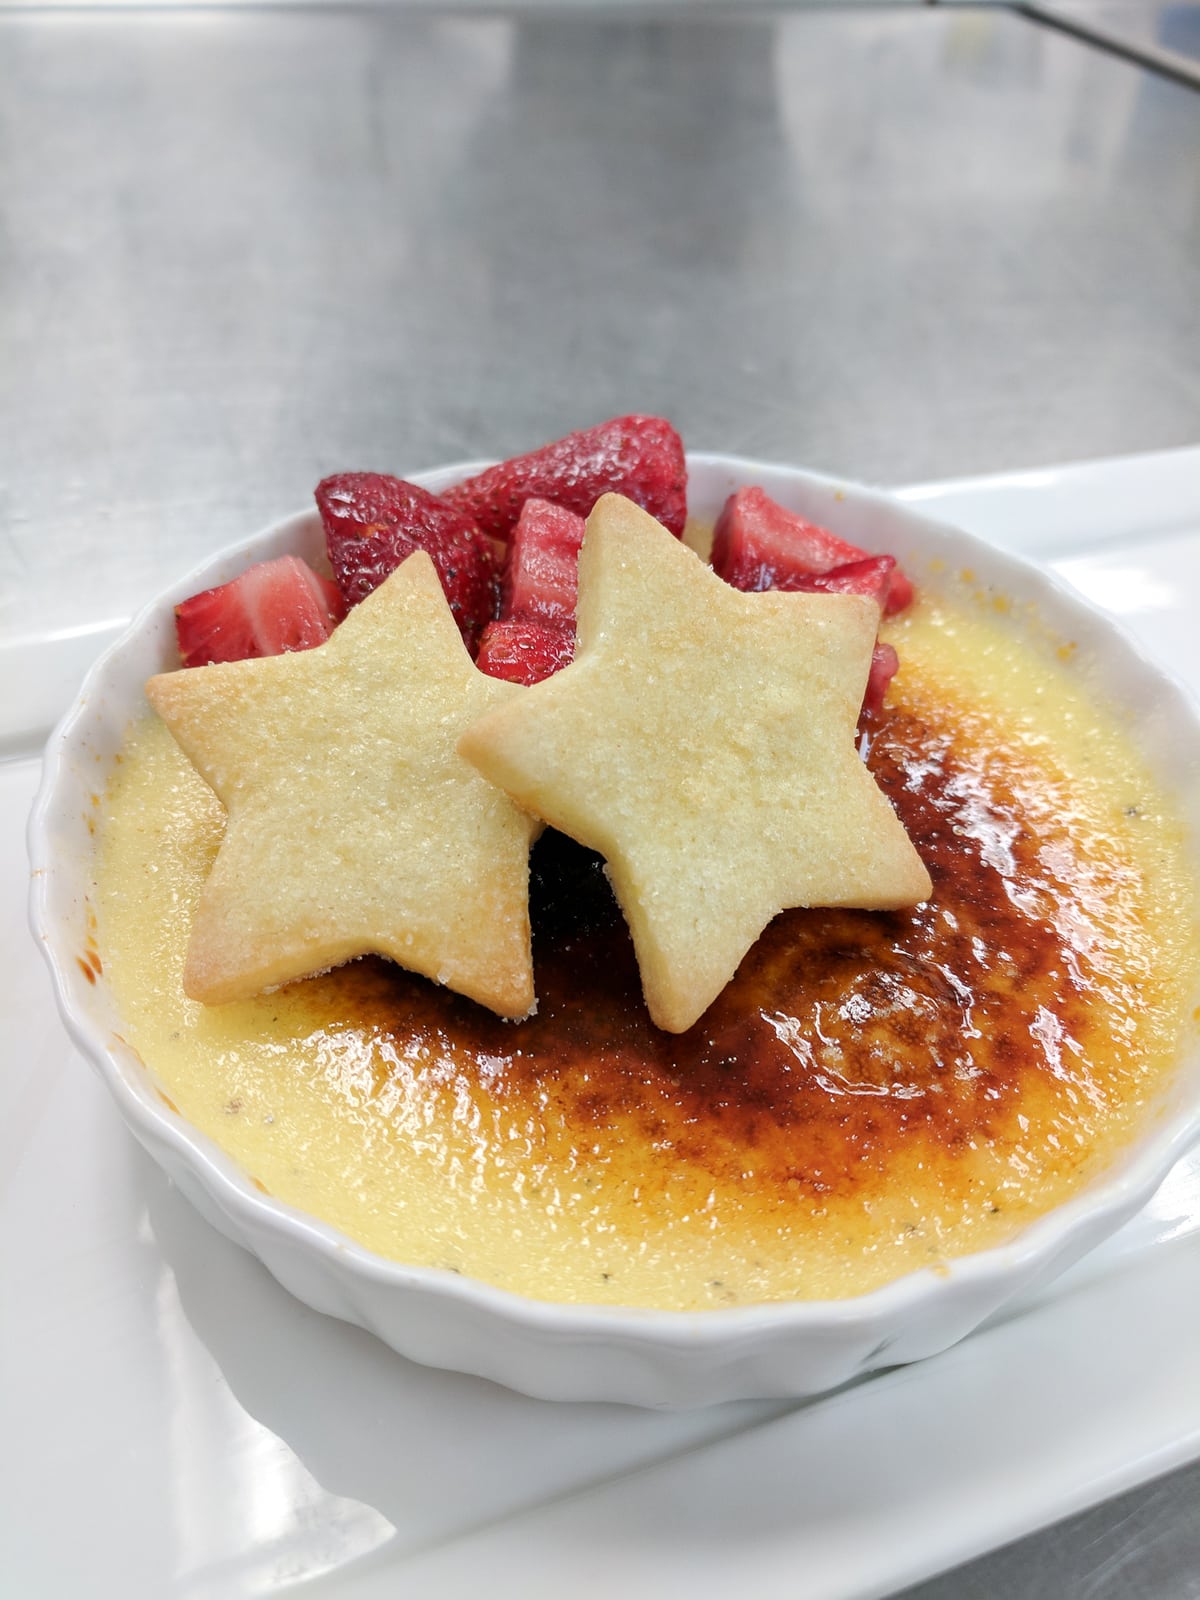
Crème brûlée
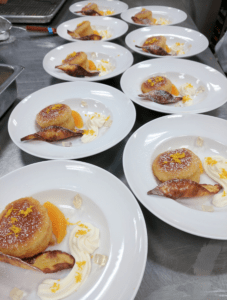
Moving on, we learned how to make cheesecake, chocolate molten cake, and various types of ice cream. As these types of desserts are served in restaurants, we also started to learn how to properly plate them. It truly is an artistic process, and I loved this aspect of this unit!
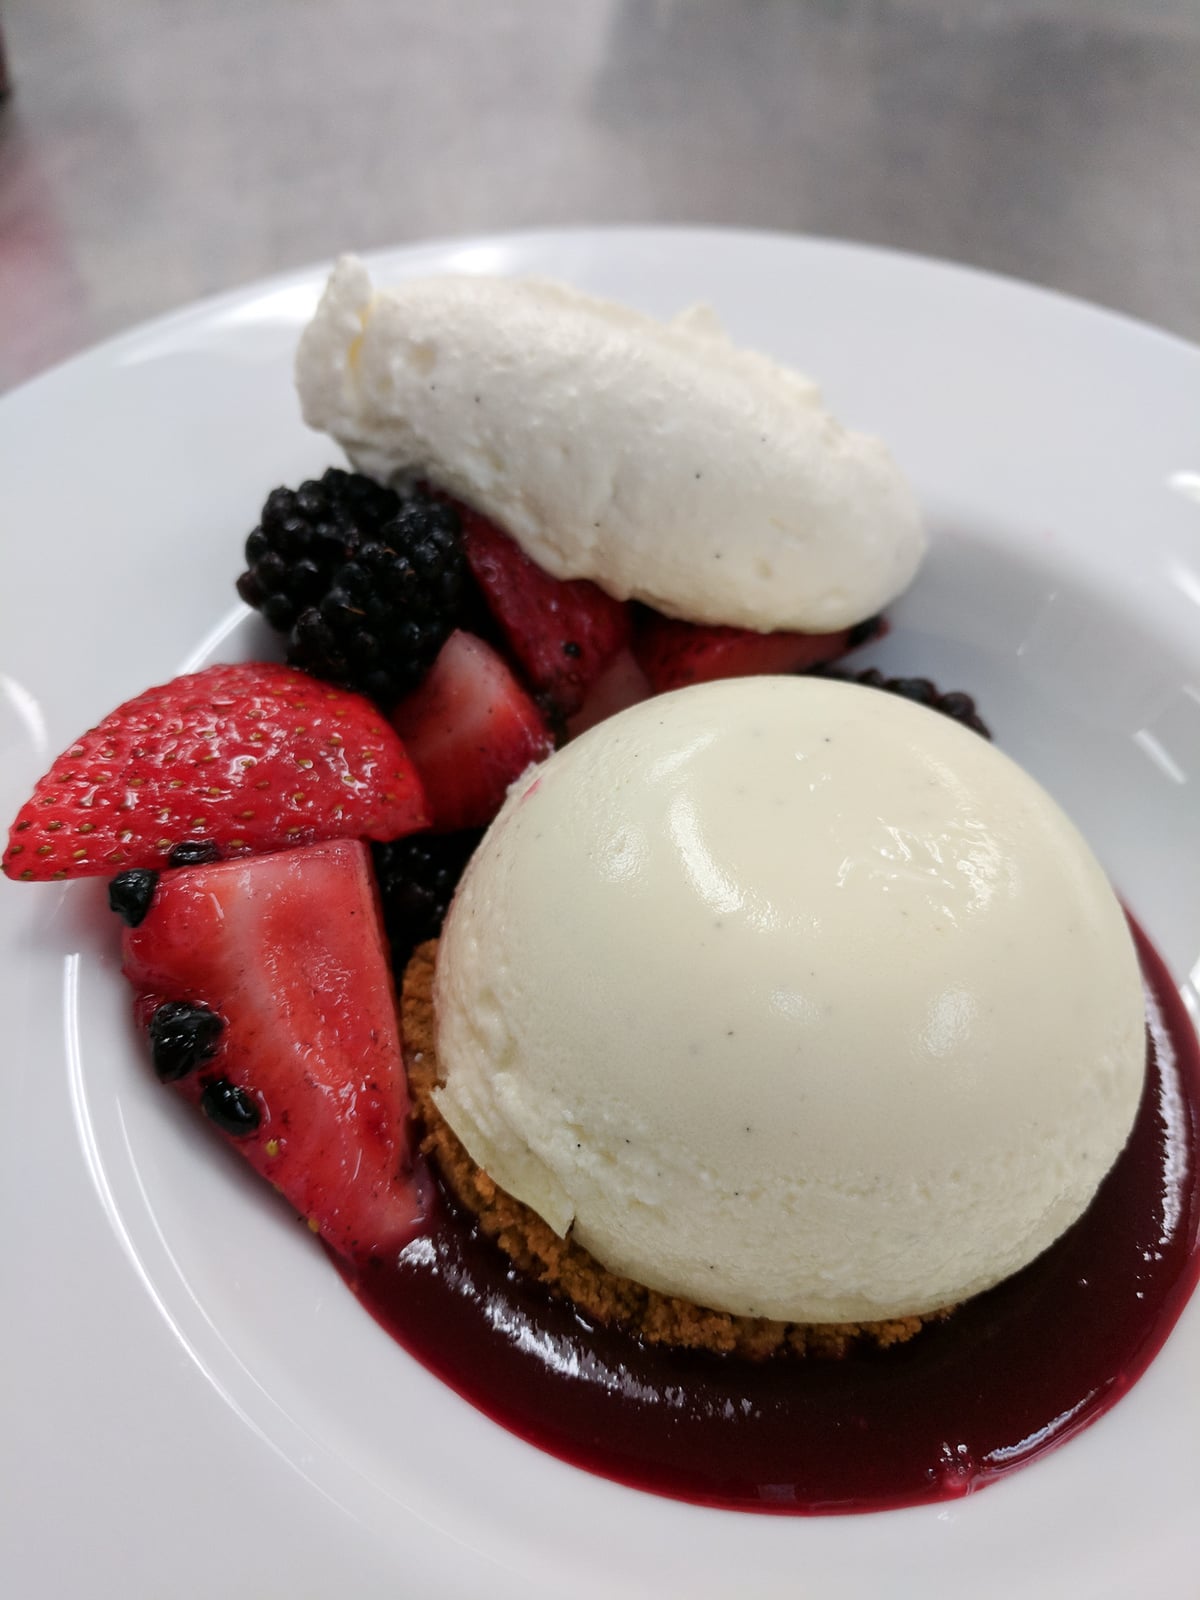
Cheesecake
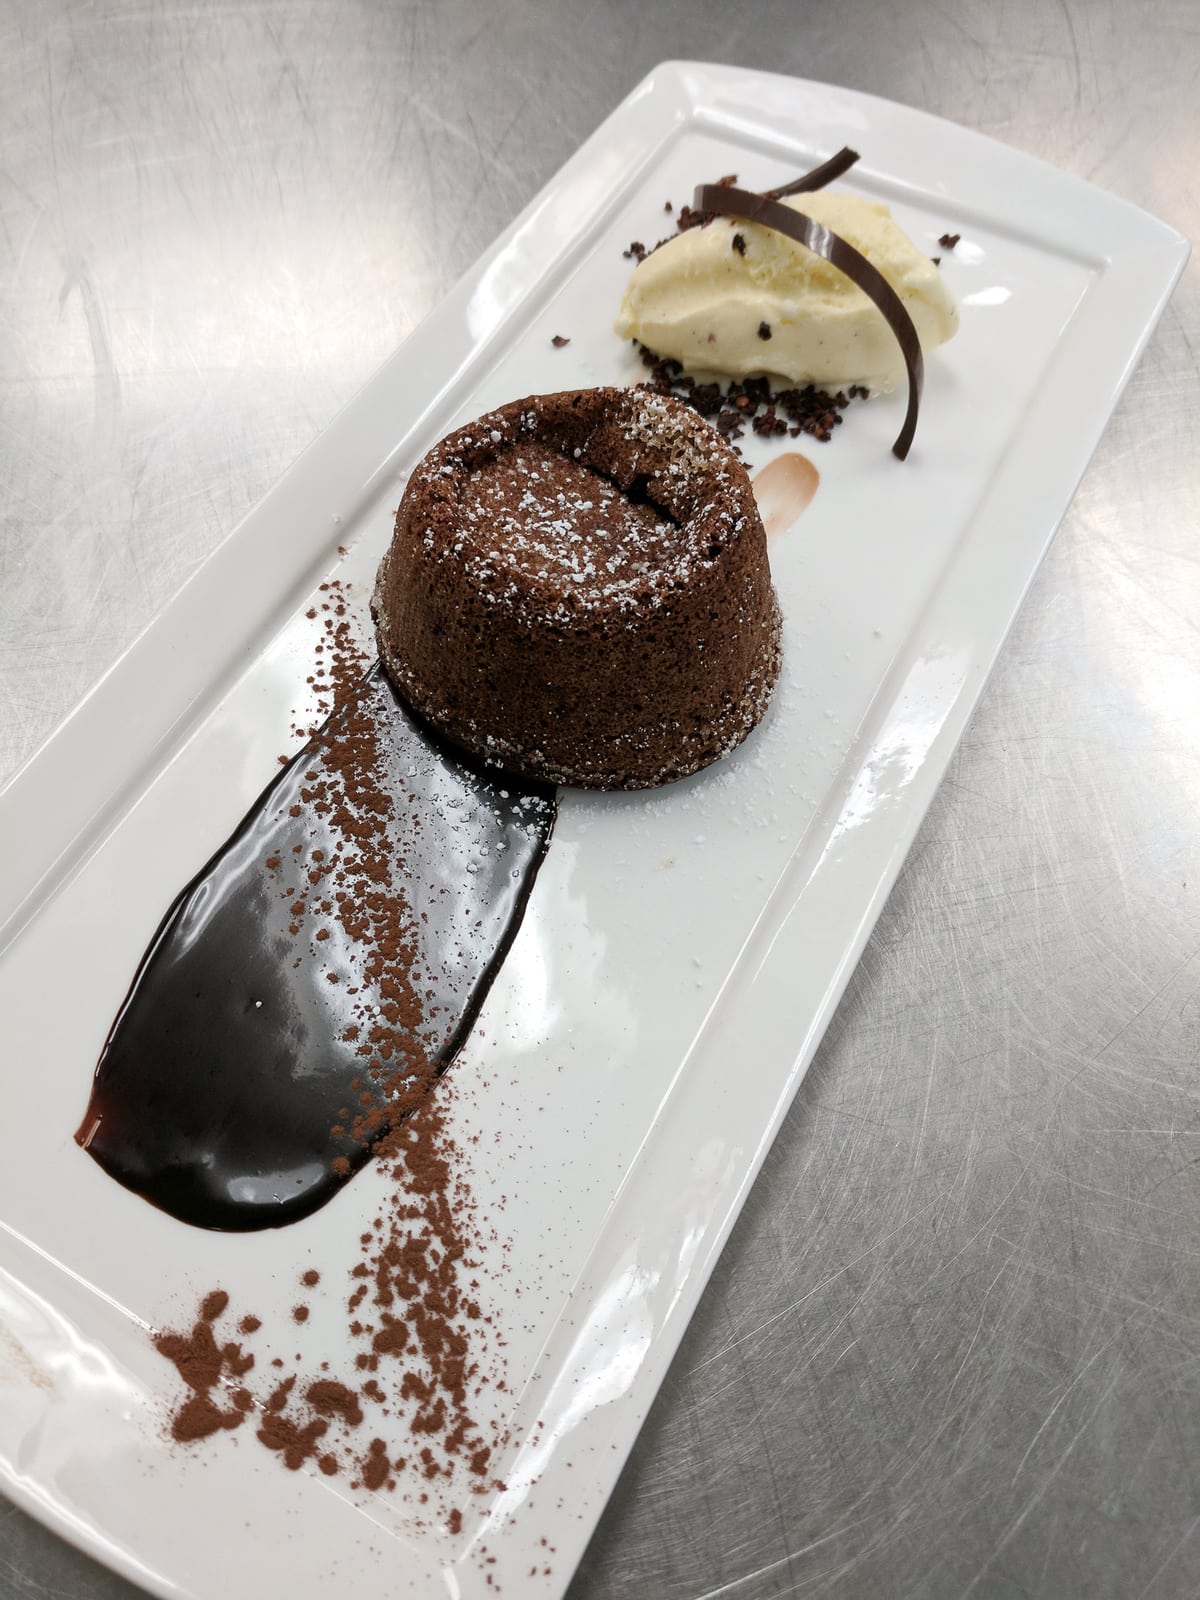
Chocolate molten cake
Of course, when it comes to desserts, you can't forget those of the fried variety. We made beignets, donuts, and even spent a day making crepes. By this point in the unit, I felt like I walked out of class each day absolutely stuffed, but I somehow found room in my stomach to eat more.
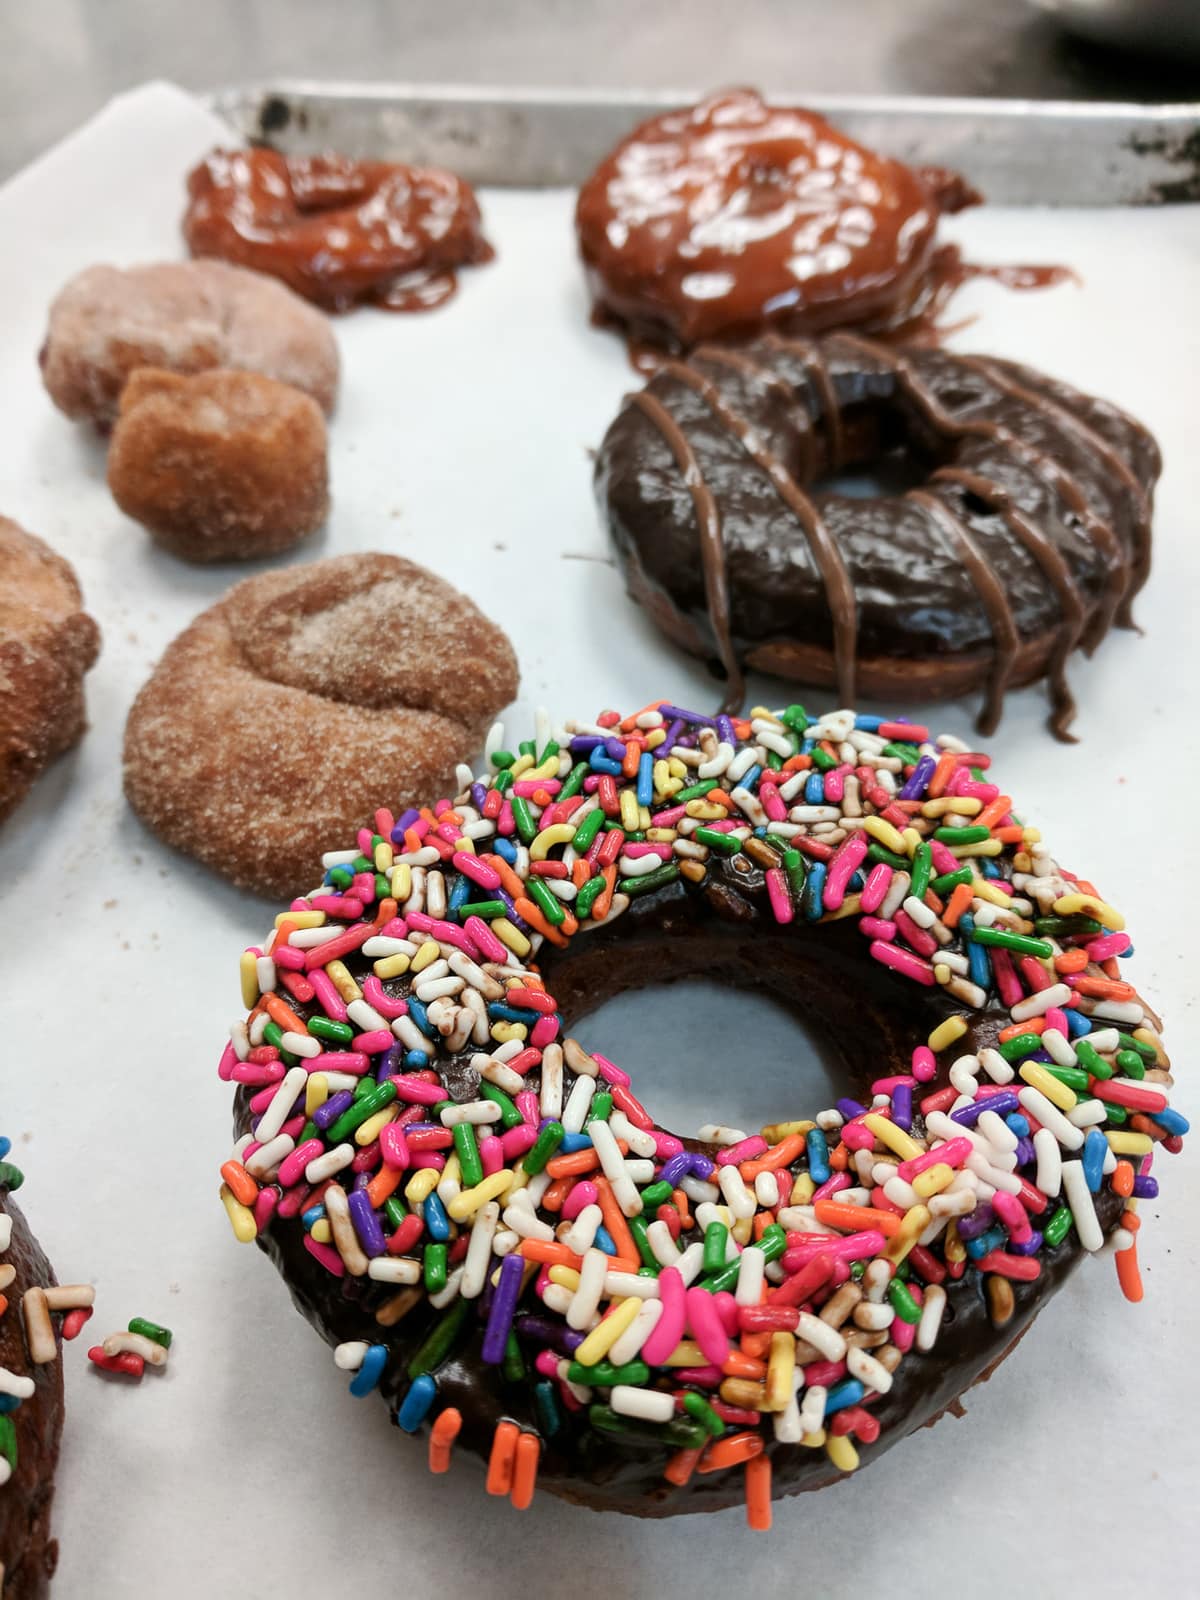
Donuts and apple fritters

Crêpes suzette
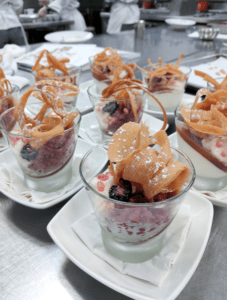
Finally, we wrapped up the unit by making all different kinds of soufflés, both sweet and savory. My favorite soufflé that we made was a passion fruit one, and it turned out so beautiful with the swirl on top!
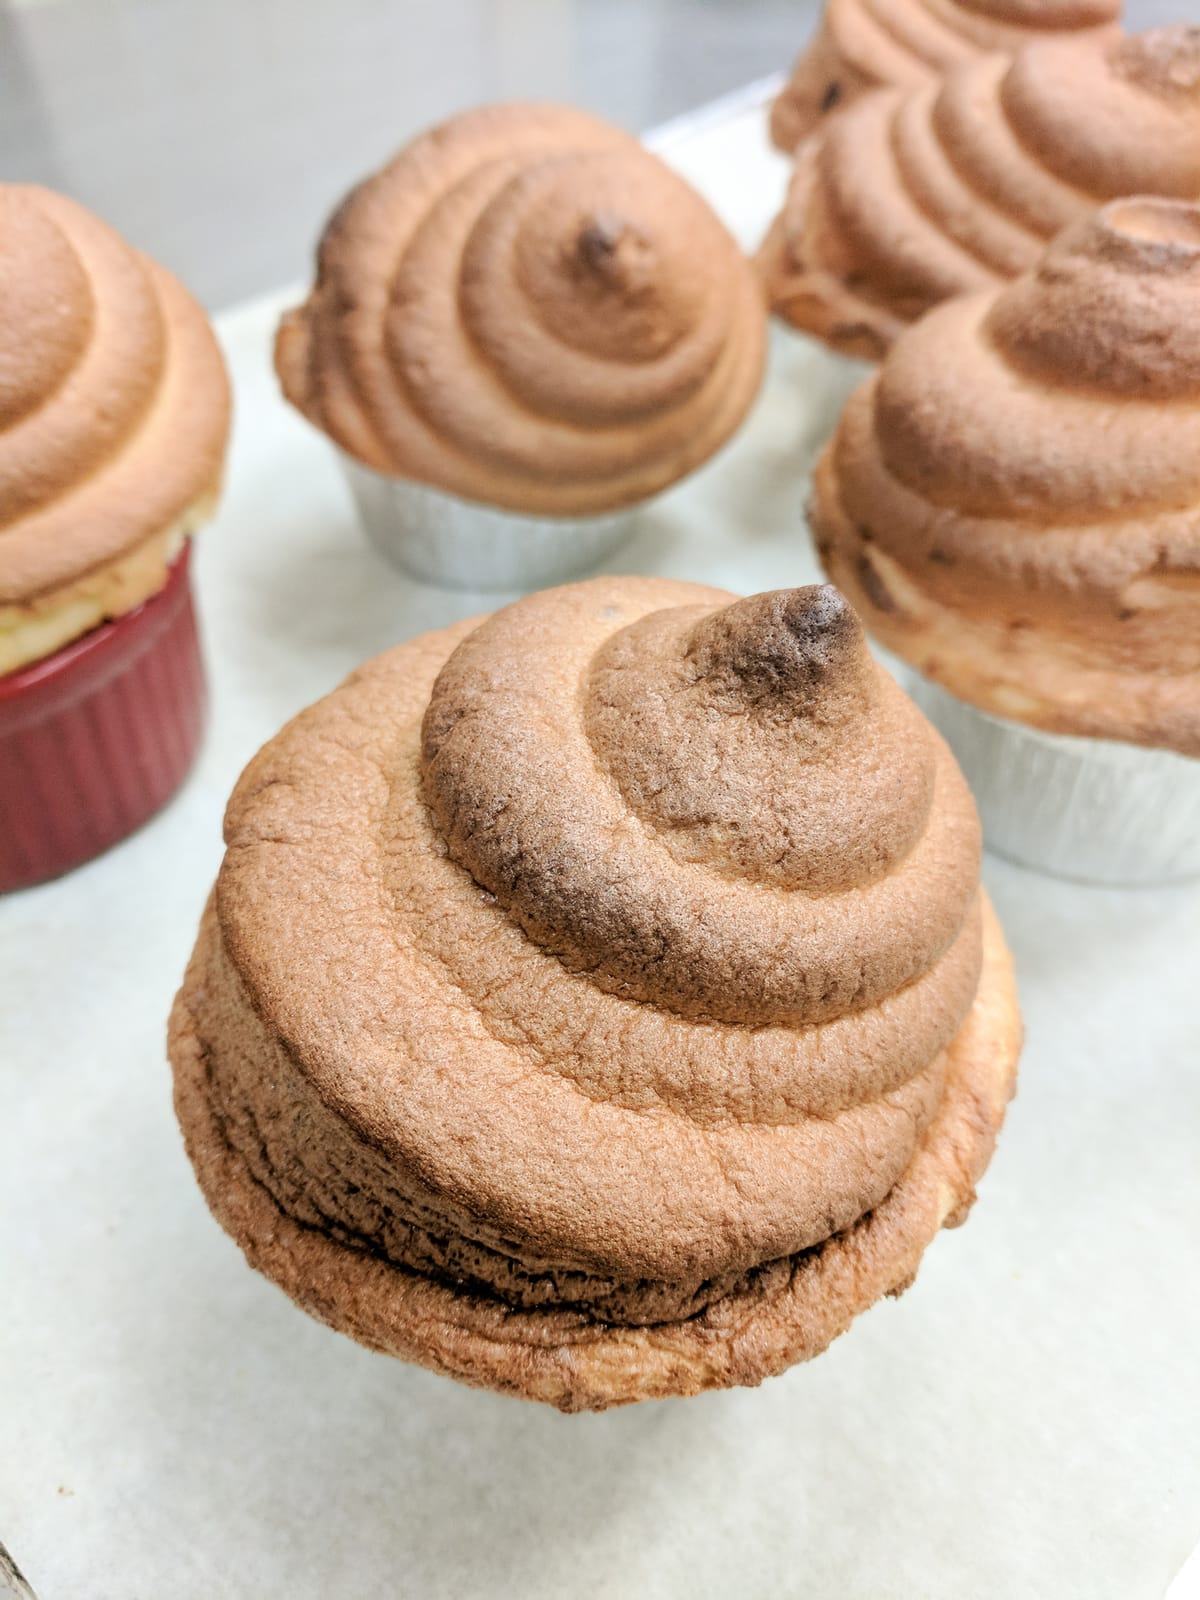
Passion fruit soufflé
Sugar 1
After eating our weights in individual desserts, we switched gears to learn all about sugar. We started off by working with marzipan and shaping marzipan fruits and vegetables.
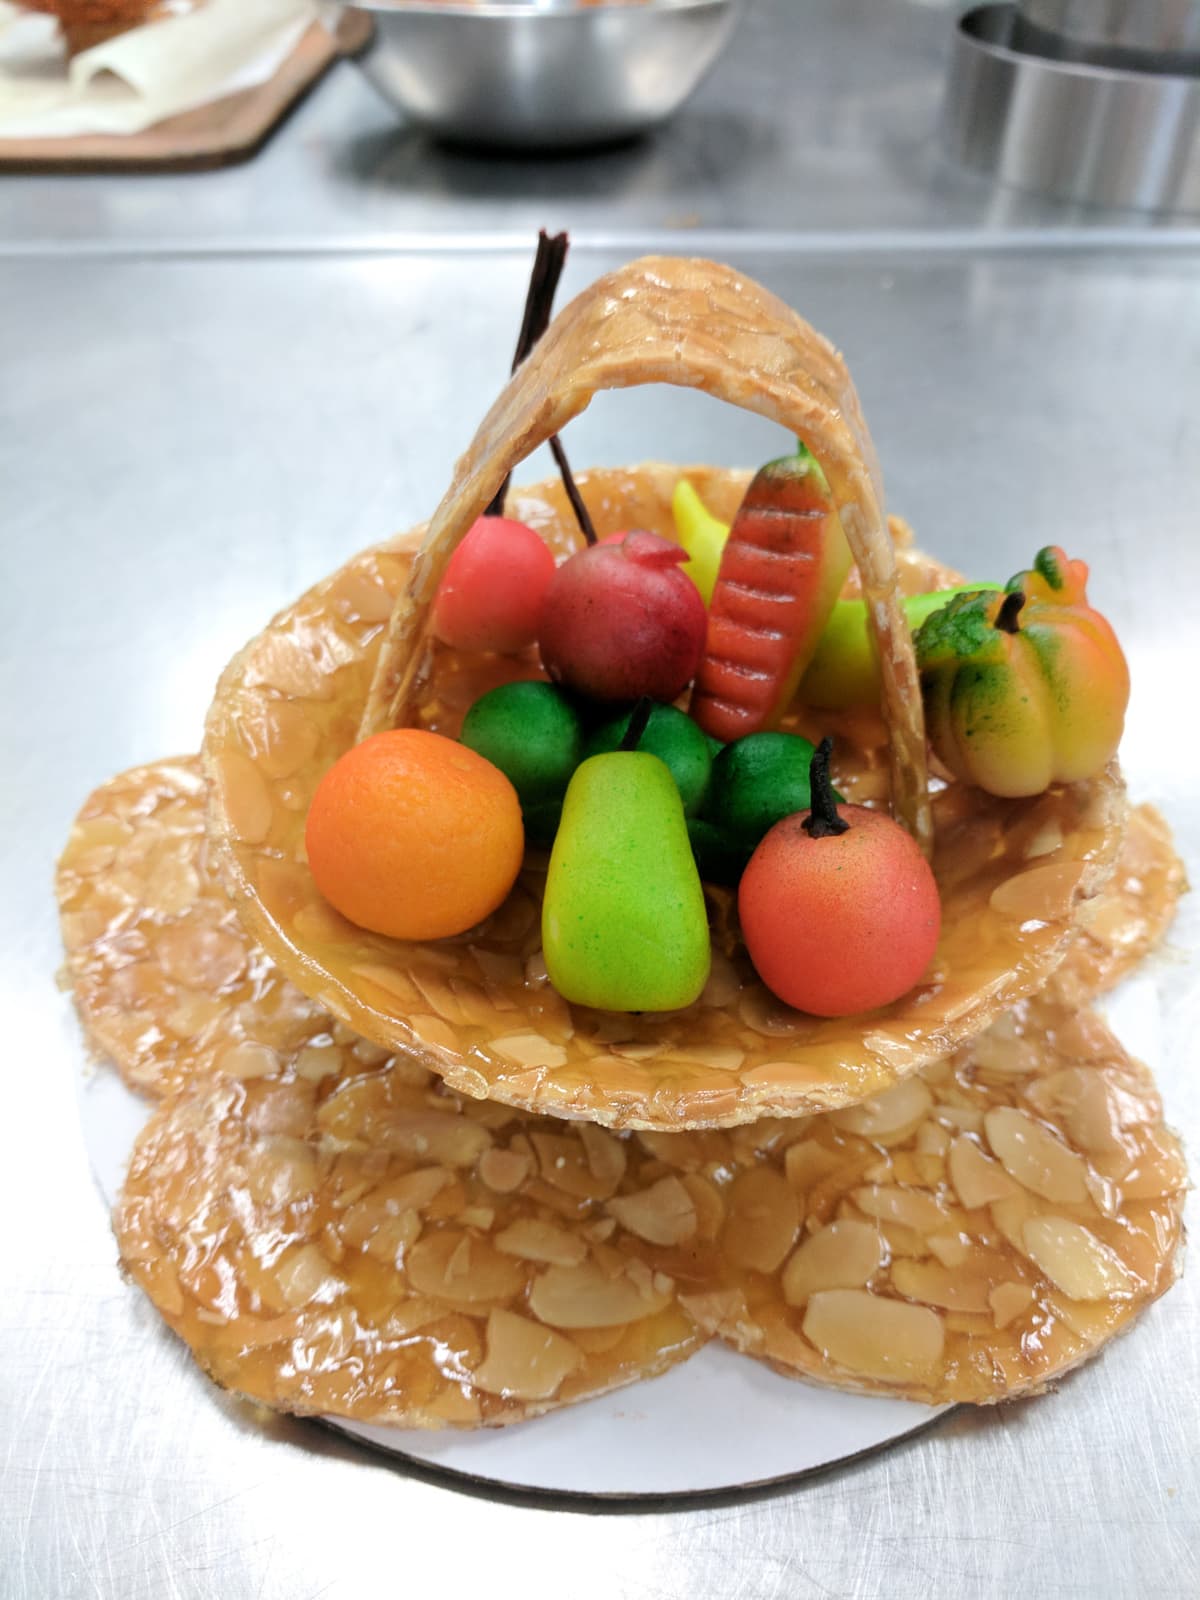
Marzipan fruits
Then, we learned how to make pastillage, a sugar paste that dries firmly, making it perfect for structures and designs. We started off simple by each making a rocking horse made out of pastillage.
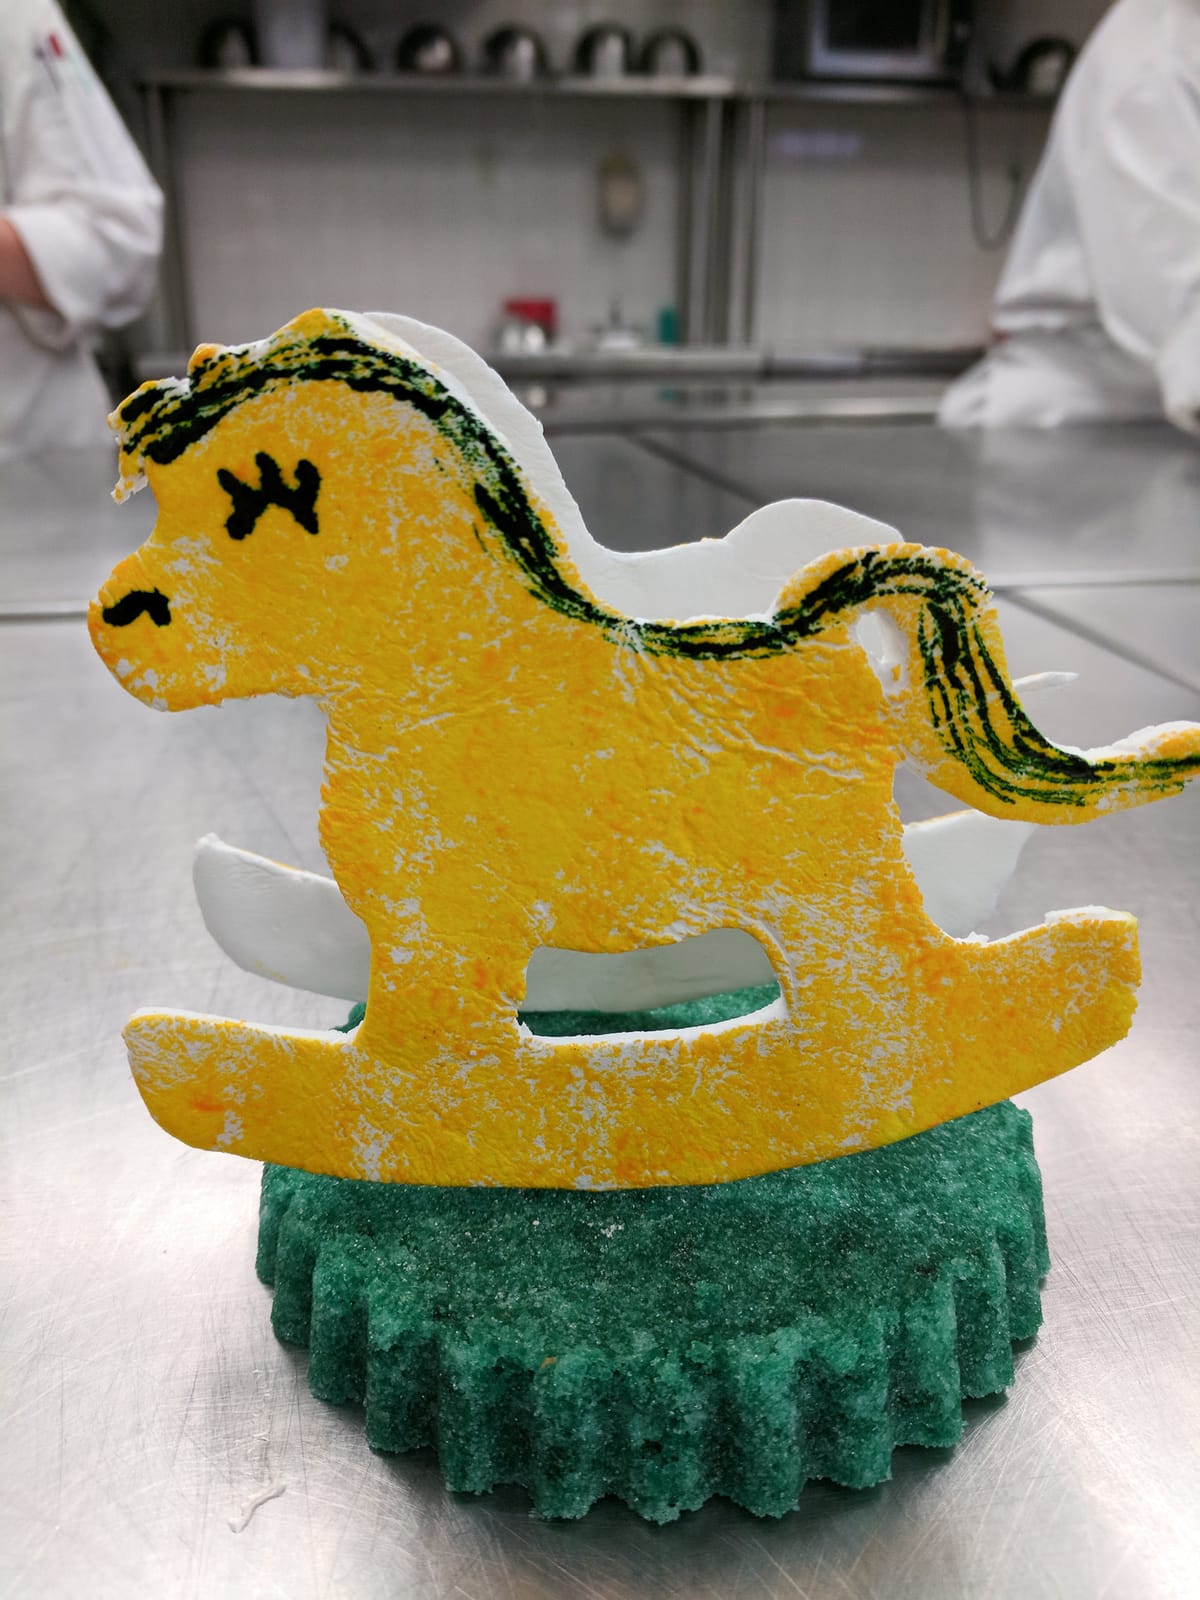
Pastillage rocking horse
My favorite part of this unit was learning how to make sugar paste flowers! You have probably seen flowers like these before on wedding cakes, and it takes quite a process to make them. We spent over five hours crafting just a few flowers, but I couldn't believe how beautiful they turned out in the end!
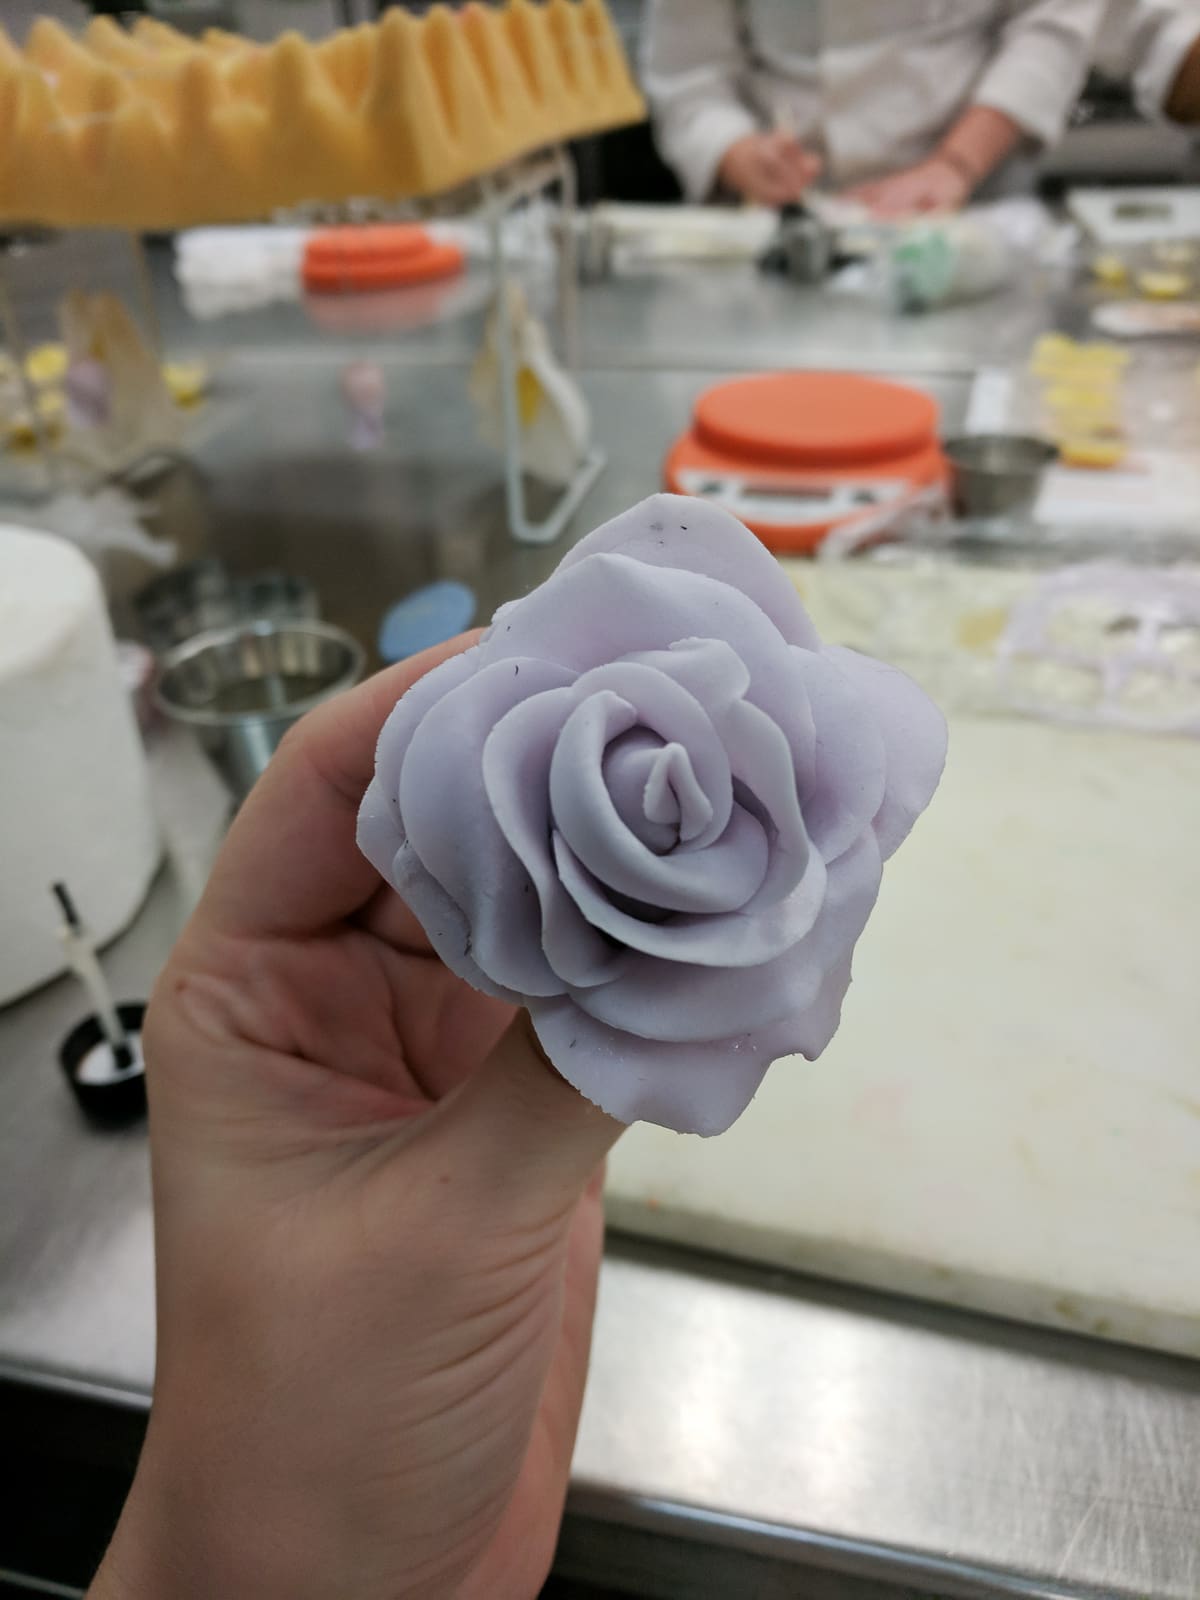
My first sugar paste rose
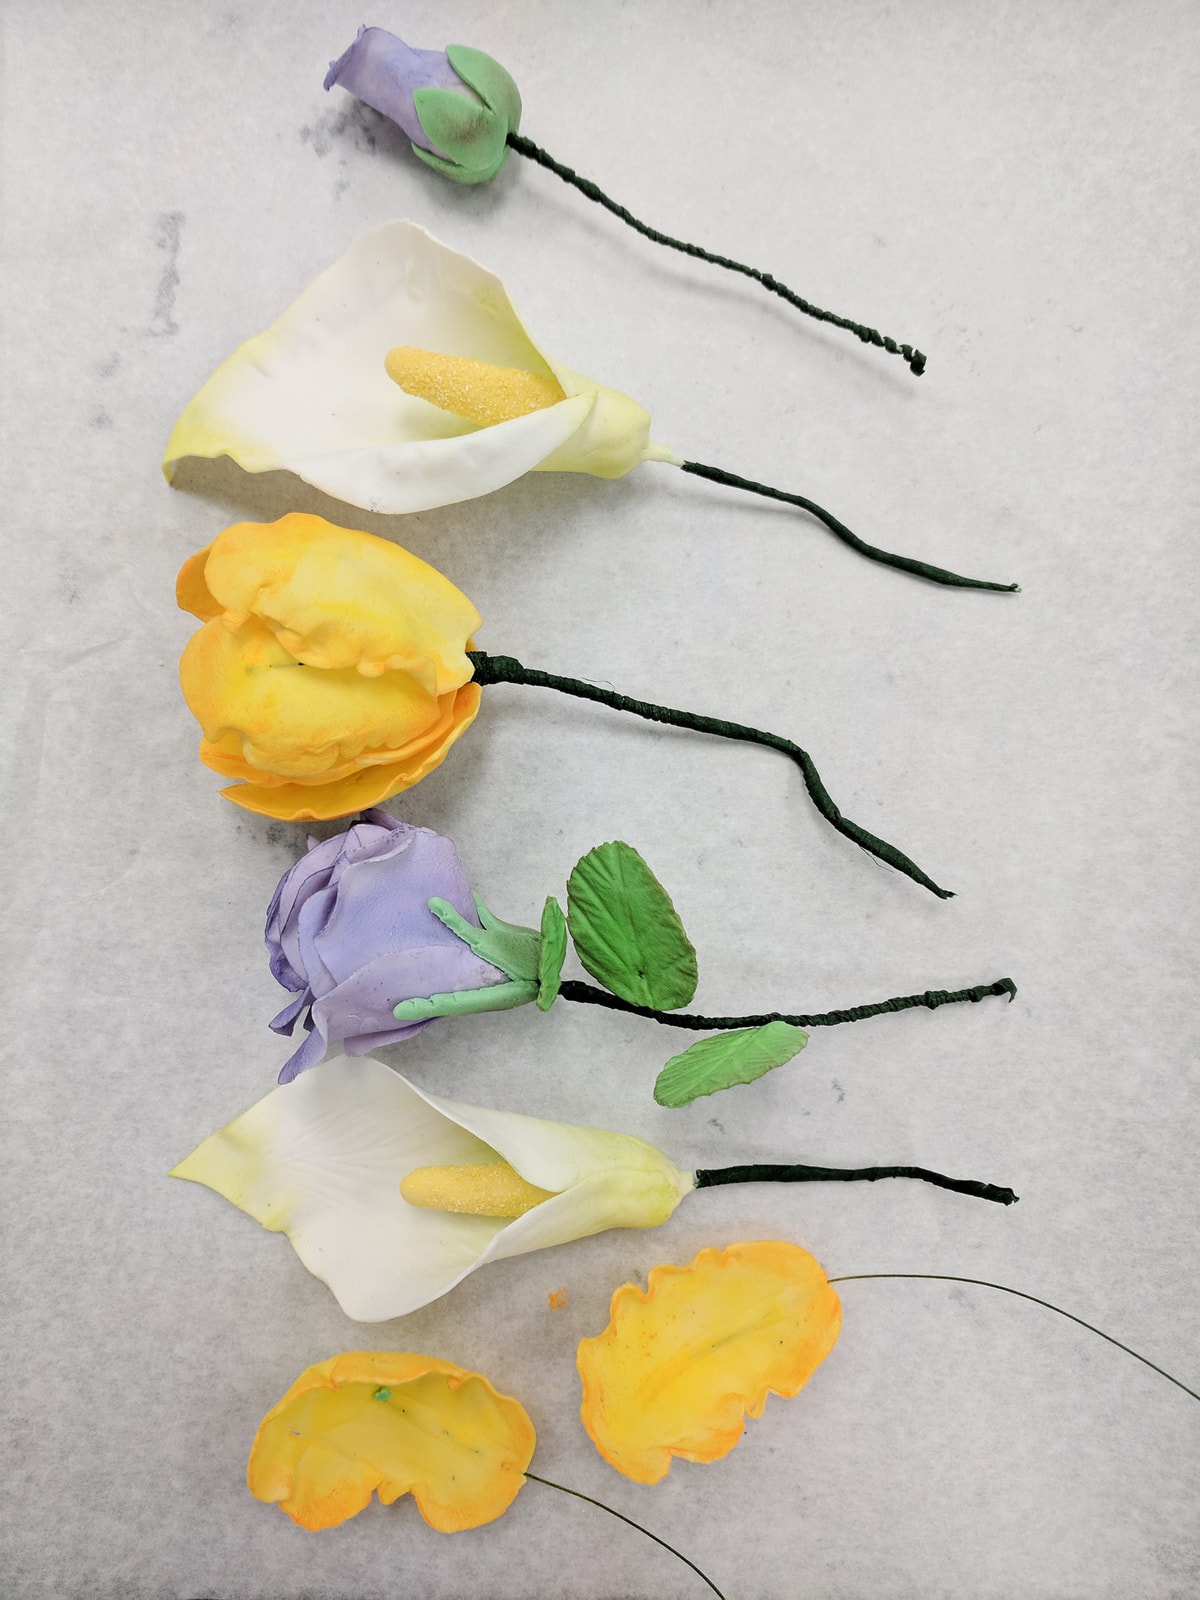
Sugar paste flowers
To wrap up this sugar unit, we had yet another showpiece to make, and this time it had to be made entirely out of pastillage. Our theme for the showpiece was nature, but we could really choose any direction to go in with the design. I decided to make a tree showing the leaves changing from summer to fall. At the base of the tree, I designed a jack-o-lantern sitting atop a bed of fallen leaves. It wasn't perfect, but I am happy it just stood up all in one piece at the end!
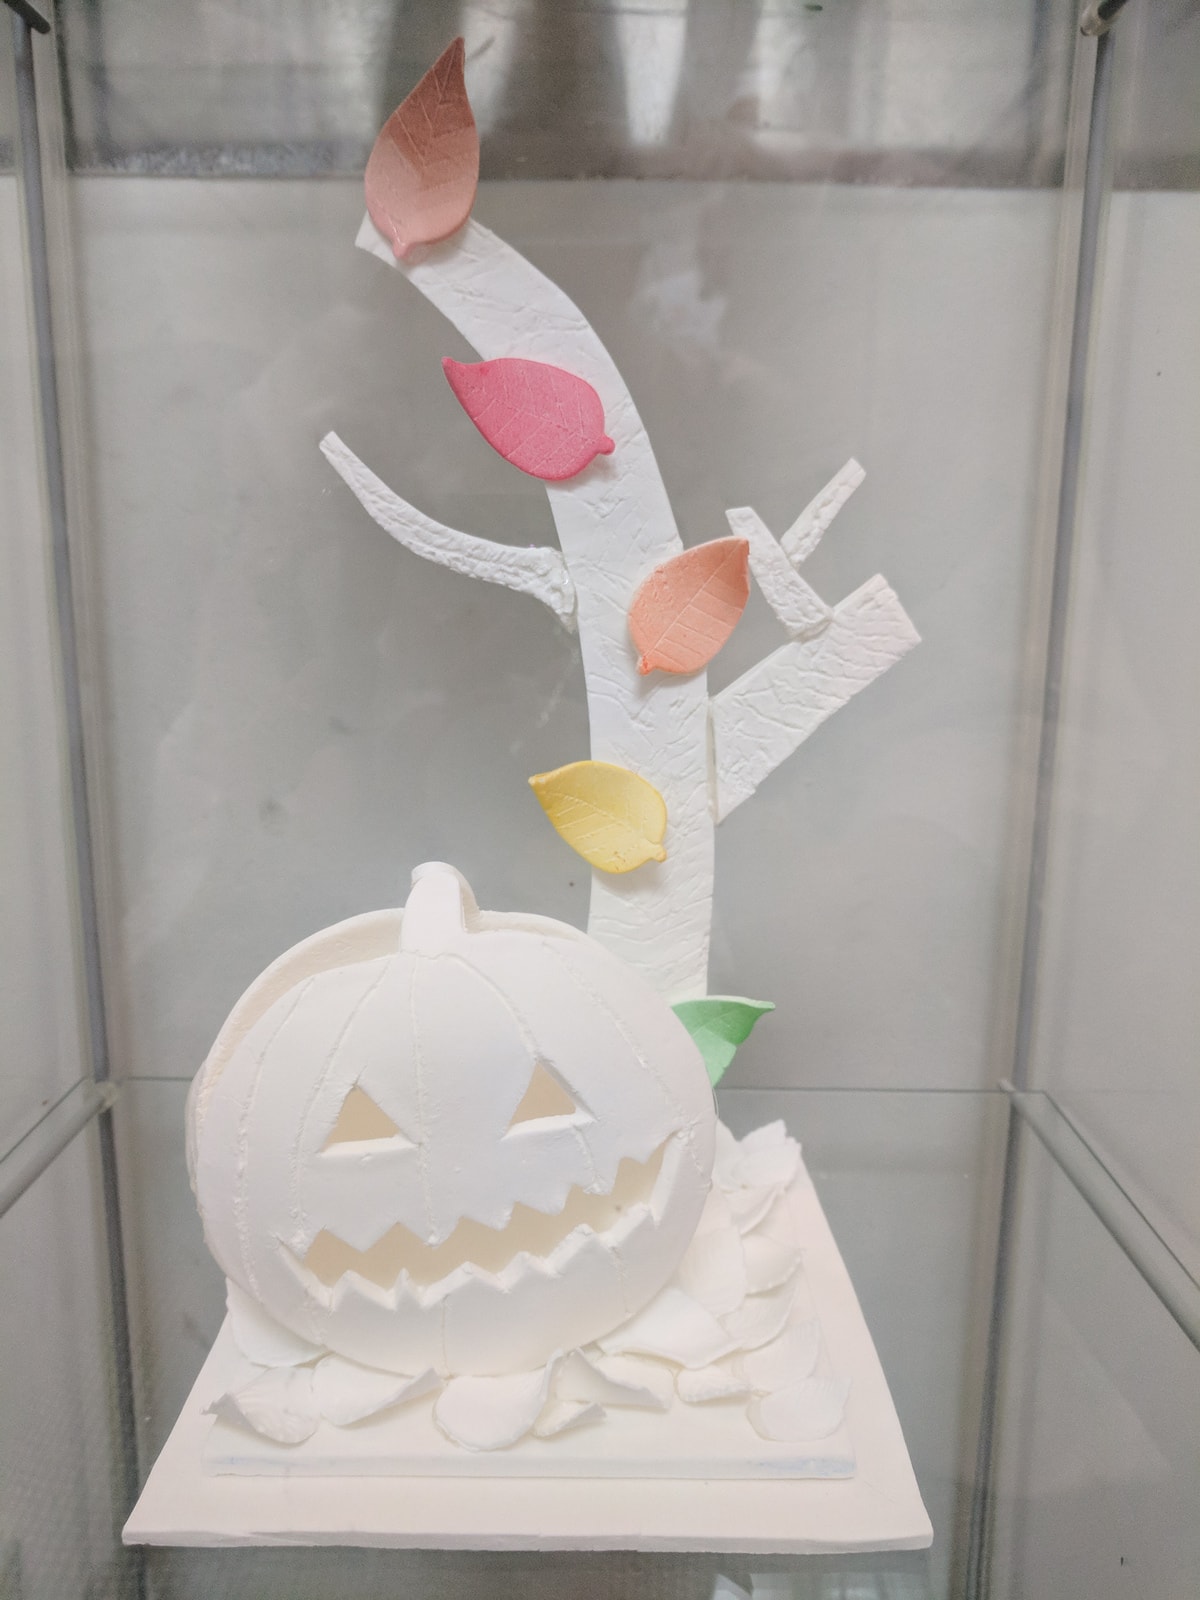
Pastillage showpiece
Can you believe that we only have two recap posts left after this? In the next one, we will go into some more advanced chocolate and sugar techniques, as well as some fancy cakes! You even get to see the very first wedding cake that I made all on my own. If you missed any of the previous recaps, make sure to check them out below.
Pastry School Recap Series
Pastry School Recap #1: Deciding to Go to Pastry School
Pastry School Recap #2: Cookies, Tarts, Pies, and Pȃte à Choux
Pastry School Recap #3: Pâte Feuilletée, Cake 1, Bread, & Viennoiserie
Pastry School Recap #4: Cake 2, Petit Fours, & Midterm Examination
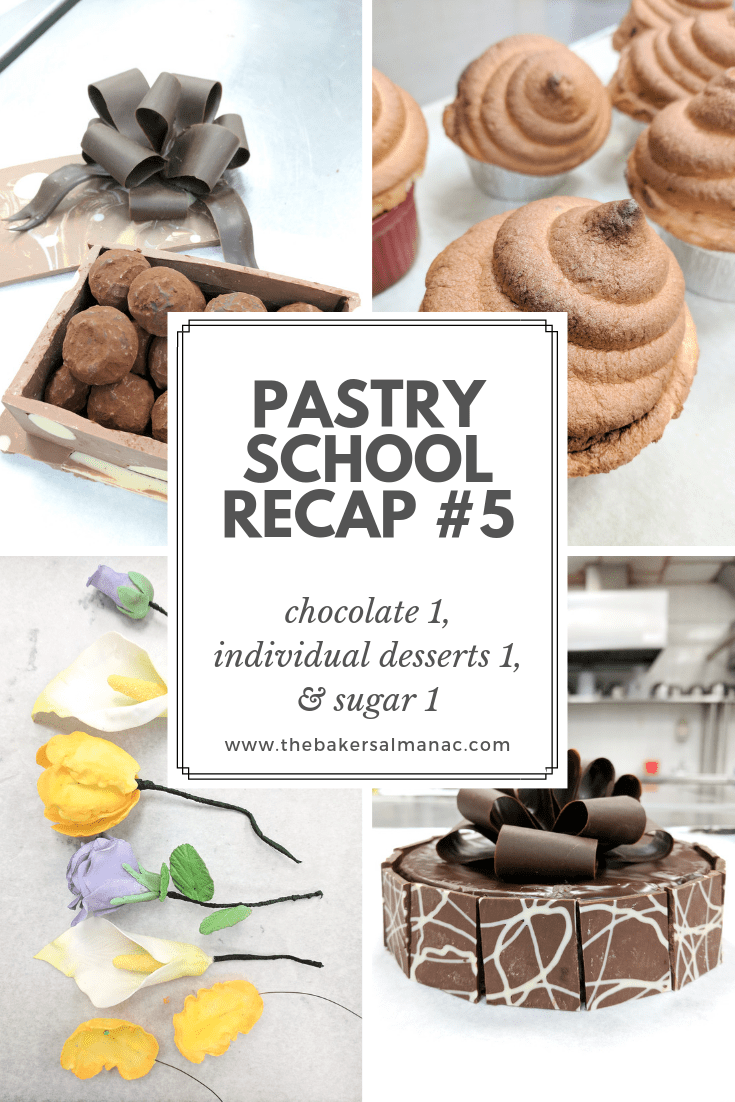
Pastry School Recap #5: Chocolate 1, Individual Desserts 1, & Sugar 1
Pastry School Recap #6: Chocolate 2, Sugar 2, & Cake 3
Pastry School Recap #7: Individual Desserts 2, Restaurant Day, & Final Exam
Such beautiful and delicious-looking creations!
Thank you! 🙂