

Welcome back to another addition in my pastry school recap series! Can you believe there are just two recaps left? I recently graduated from pastry school at The International Culinary Center, and I am sharing all about my experience here on The Baker’s Almanac. If you missed the first few recaps, make sure to check out the links below to get caught up.
Chocolate 2
After making our elaborate sugar showpieces, I was eager to get back to doing chocolate again. During the Chocolate 2 unit, we moved onto learning more advanced chocolate techniques. Who knew there was so much that you could do with chocolate?
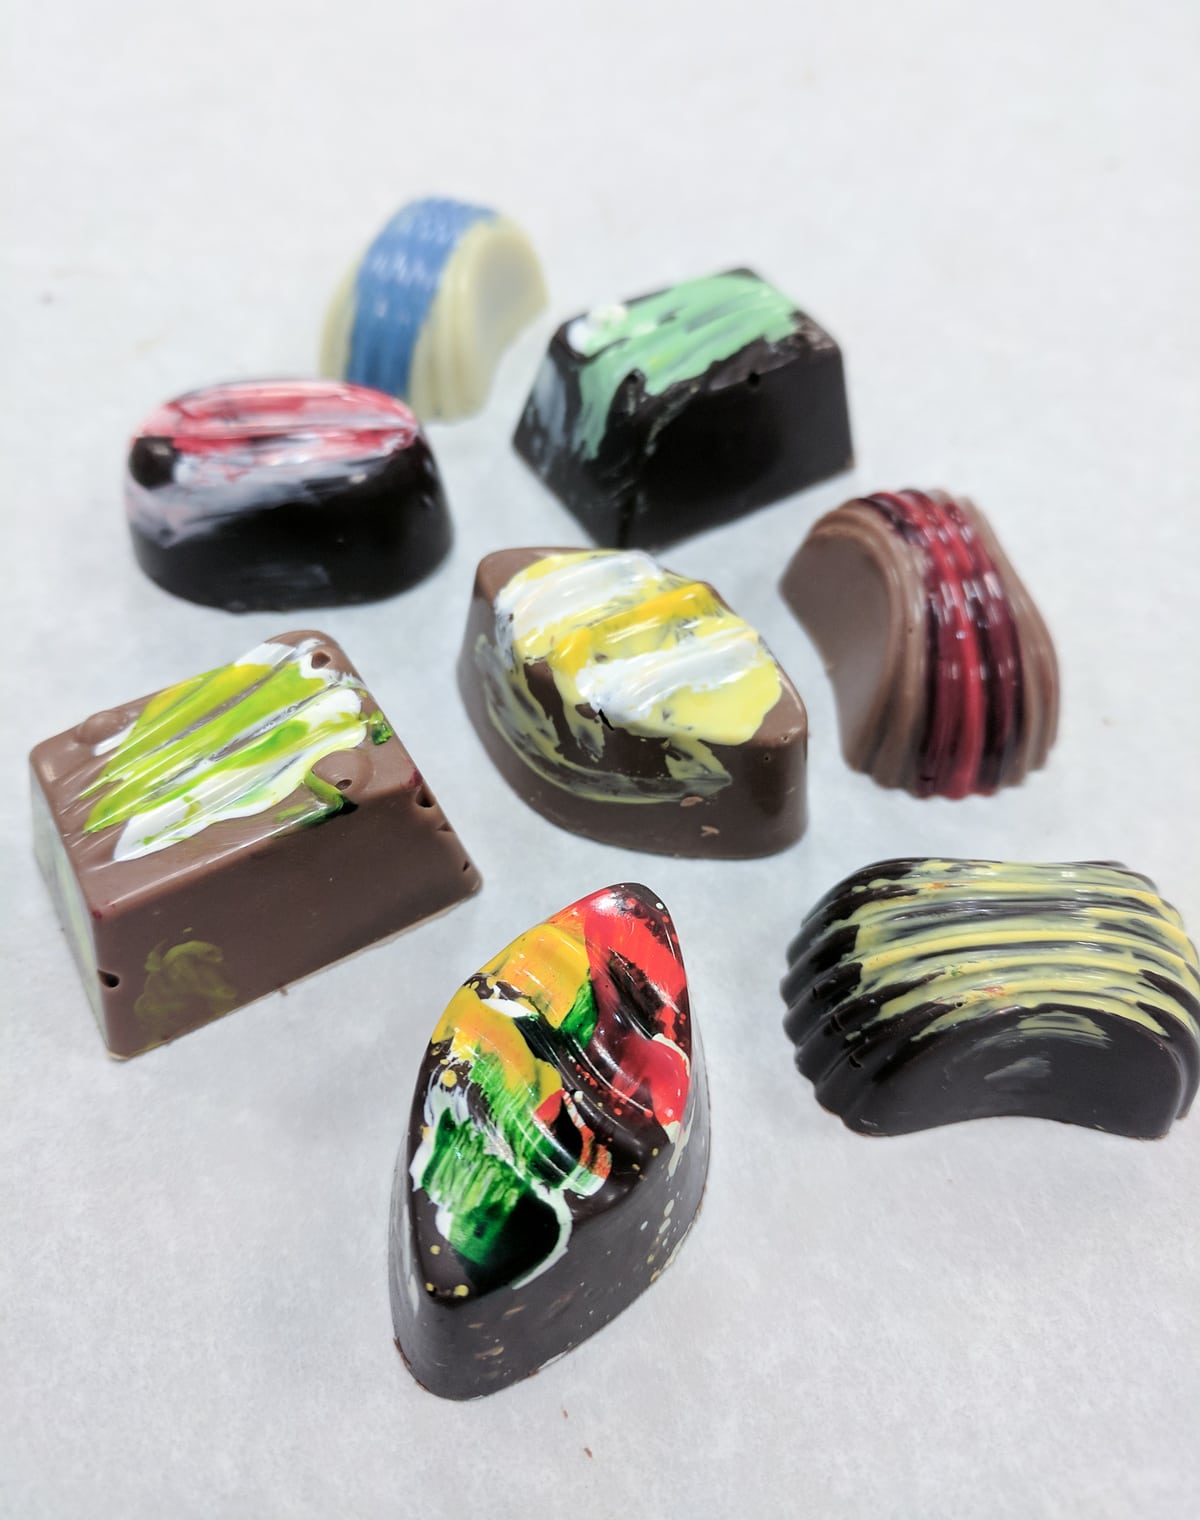
We made lots of different confections, such as peppermint patties and branchis. For these confections, we completely enrobed them in tempered chocolate, which is a fun but time-intensive process!

Branchis, peppermint patties, and peanut butter squares before being enrobed in chocolate
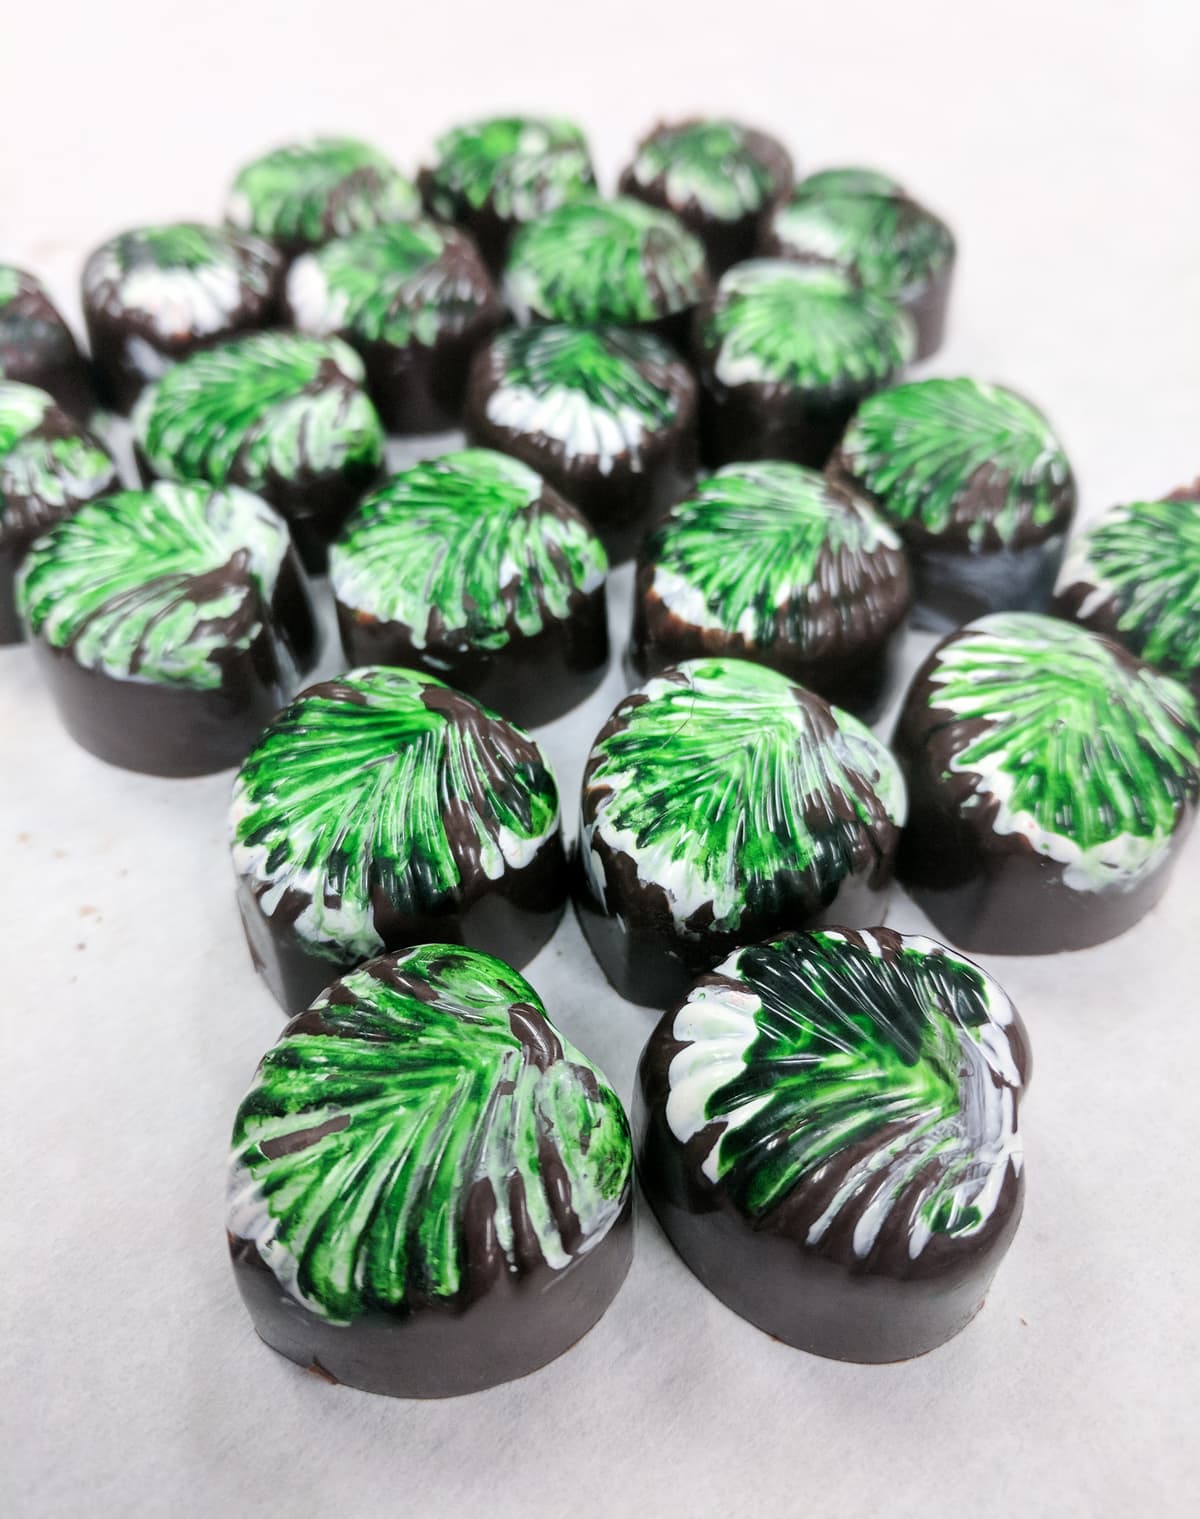
One of the most challenging parts of this unit for me involved learning to make bonbons. Bonbons are small confections coated in chocolate, and they can have a variety of fillings. To make bonbons, you go through quite the process:
- Pour tempered chocolate into a bonbon mold and let it start to set
- Next, pour in bonbon filling
- Then, pour more tempered chocolate on top to seal the bonbon
- Once completely set, unmold the bonbons
Bonbons
We made bonbons a few different times, but a lot of the first ones I made cracked, causing the filling to spill out. But, by the end, I started to get the hang of it! We also made cherry cordials, which follow the same process.
More bonbons
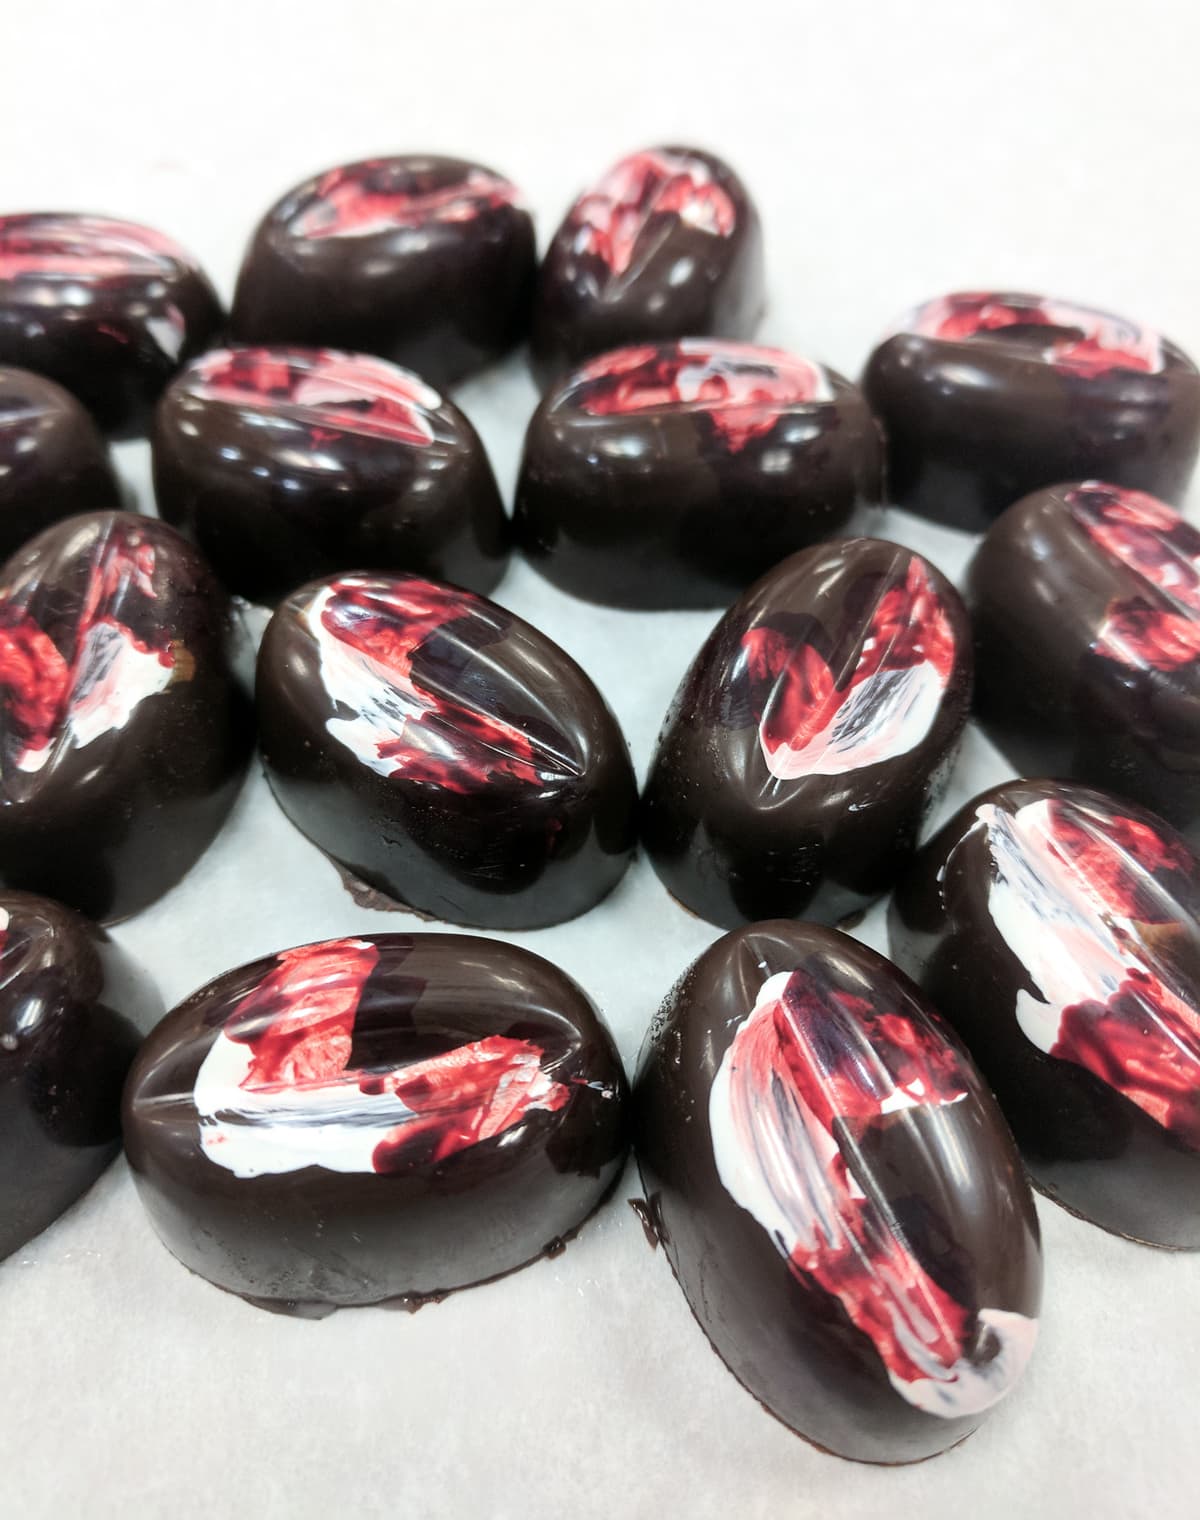
Cherry cordials
During this unit, I got the chance to try my hand and making my first two-tiered cakes. We made a chocolate cake, covered it with ganache frosting, and then made chocolate collars to go around the cake. Using white chocolate and cocoa butter colors, I painted sunflowers on my chocolate collar. My completed cake looked a bit messy, but I am just proud that the chocolate collar stayed on!
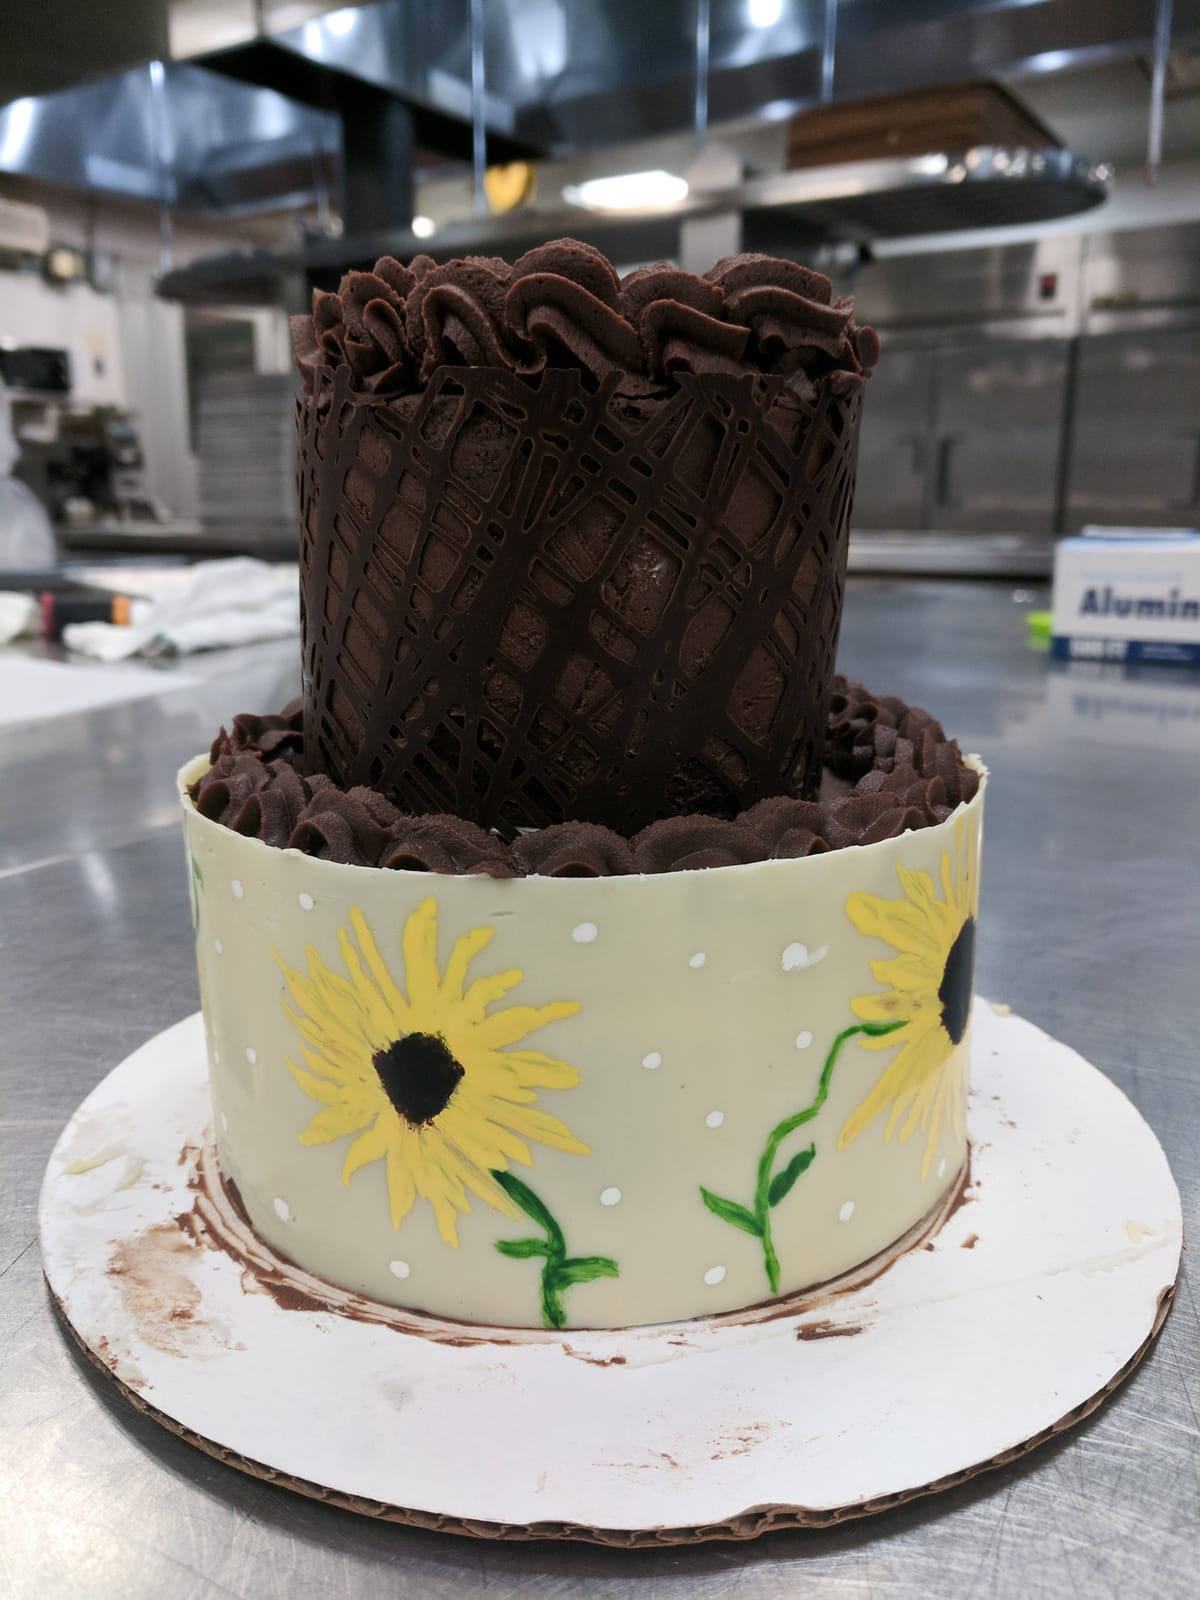
Two-tiered chocolate cake
At the end of this chocolate unit, we had to make yet another showpiece. This time, our class decided on the theme of fairytales. We could make anything we wanted out of chocolate, but it had to involve several advanced chocolate techniques and fit this theme. I decided to make a structure inspired by Jack and the Beanstalk, and I think I did a pretty good job.
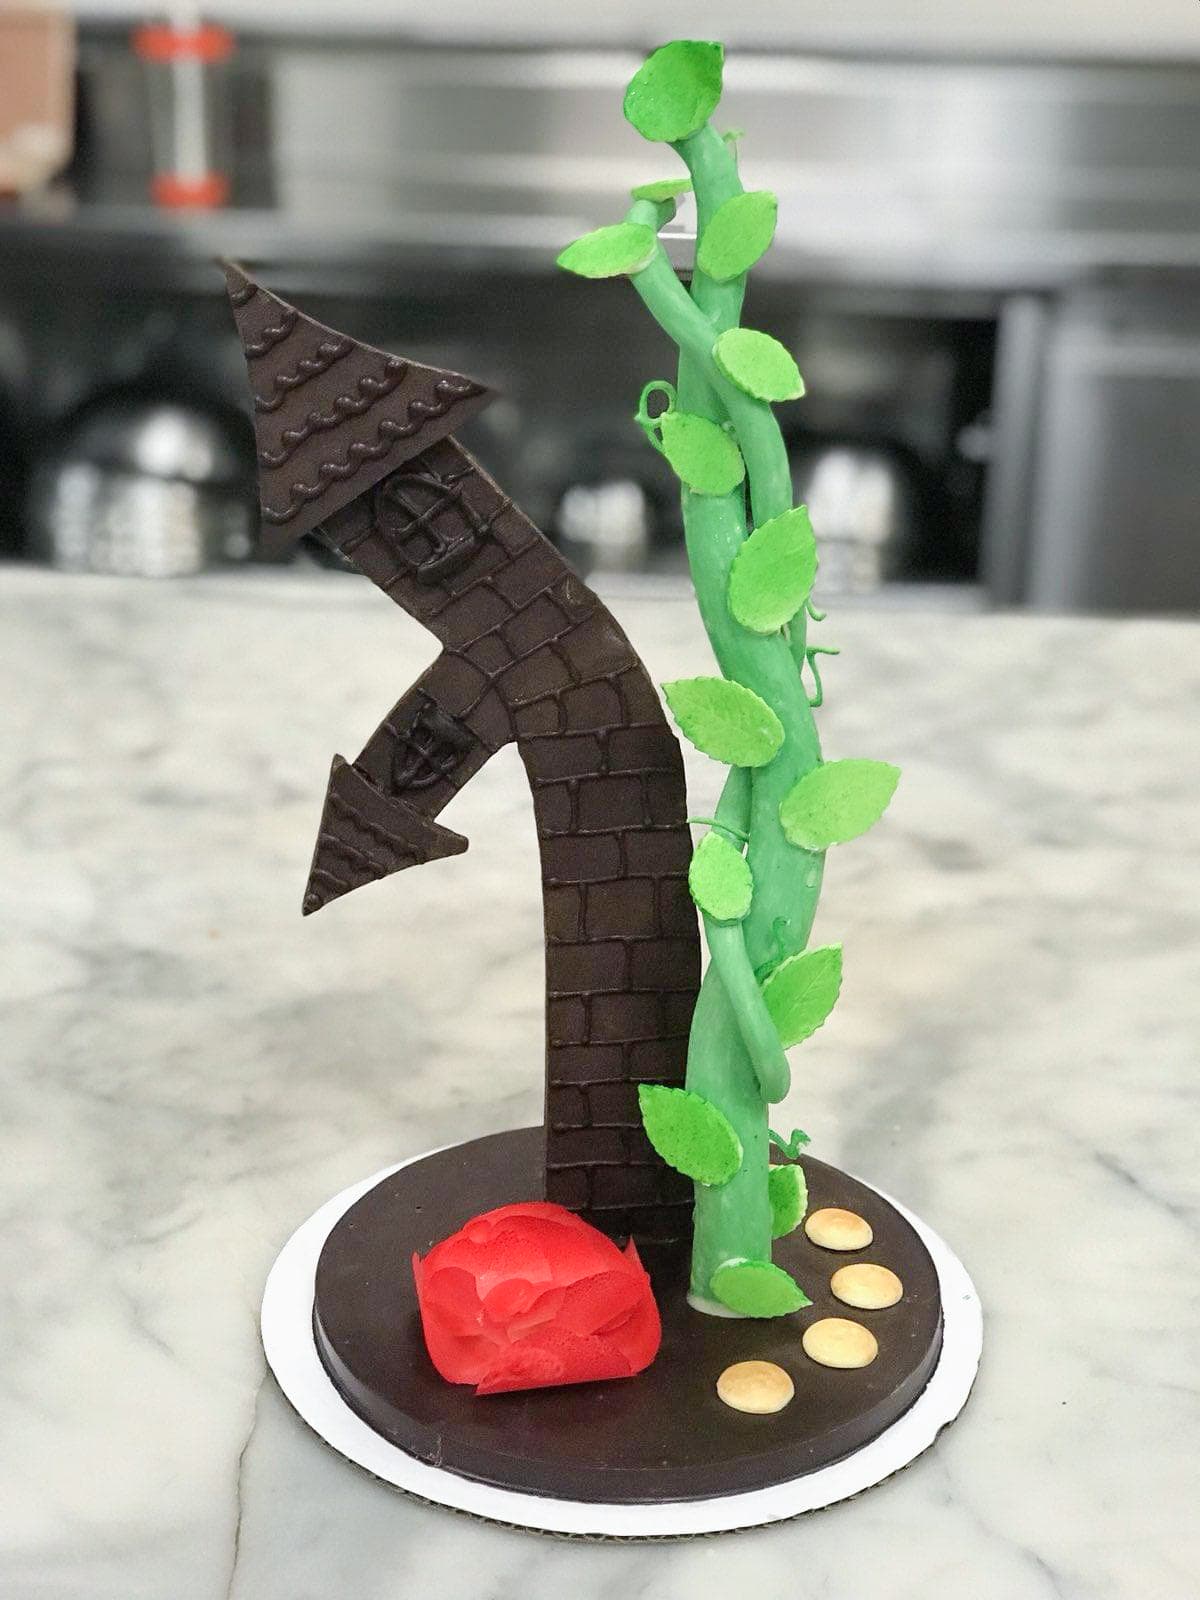
Jack and the Beanstalk chocolate showpiece
To make the castle, I poured tempered chocolate, cut out the structures, and then glued them together with tempered chocolate. For the beanstalk, I used a Robot Coupe to grind white chocolate and a green cocoa butter color. Doing this makes the chocolate quite moldable, which I rolled and shaped to look like the beanstalk. Assembling the showpiece was terrifying, and part of the beanstalk cracked on me! I managed to glue it back together, but I feel like I lost a few years off my life making this showpiece.
Sugar 2
After finishing my chocolate showpiece, I honestly felt like I could never touch chocolate again and be content. Switching gears, we turned to sugar again and moved onto learning some very difficult sugar techniques.
First, we learned how to make poured sugar. To do this, you basically heat sugar to a very high temperate, then pour it onto a silicone mat (silpat). You can use molds and other techniques to make specific shapes, and we made poured sugar owls through this process.
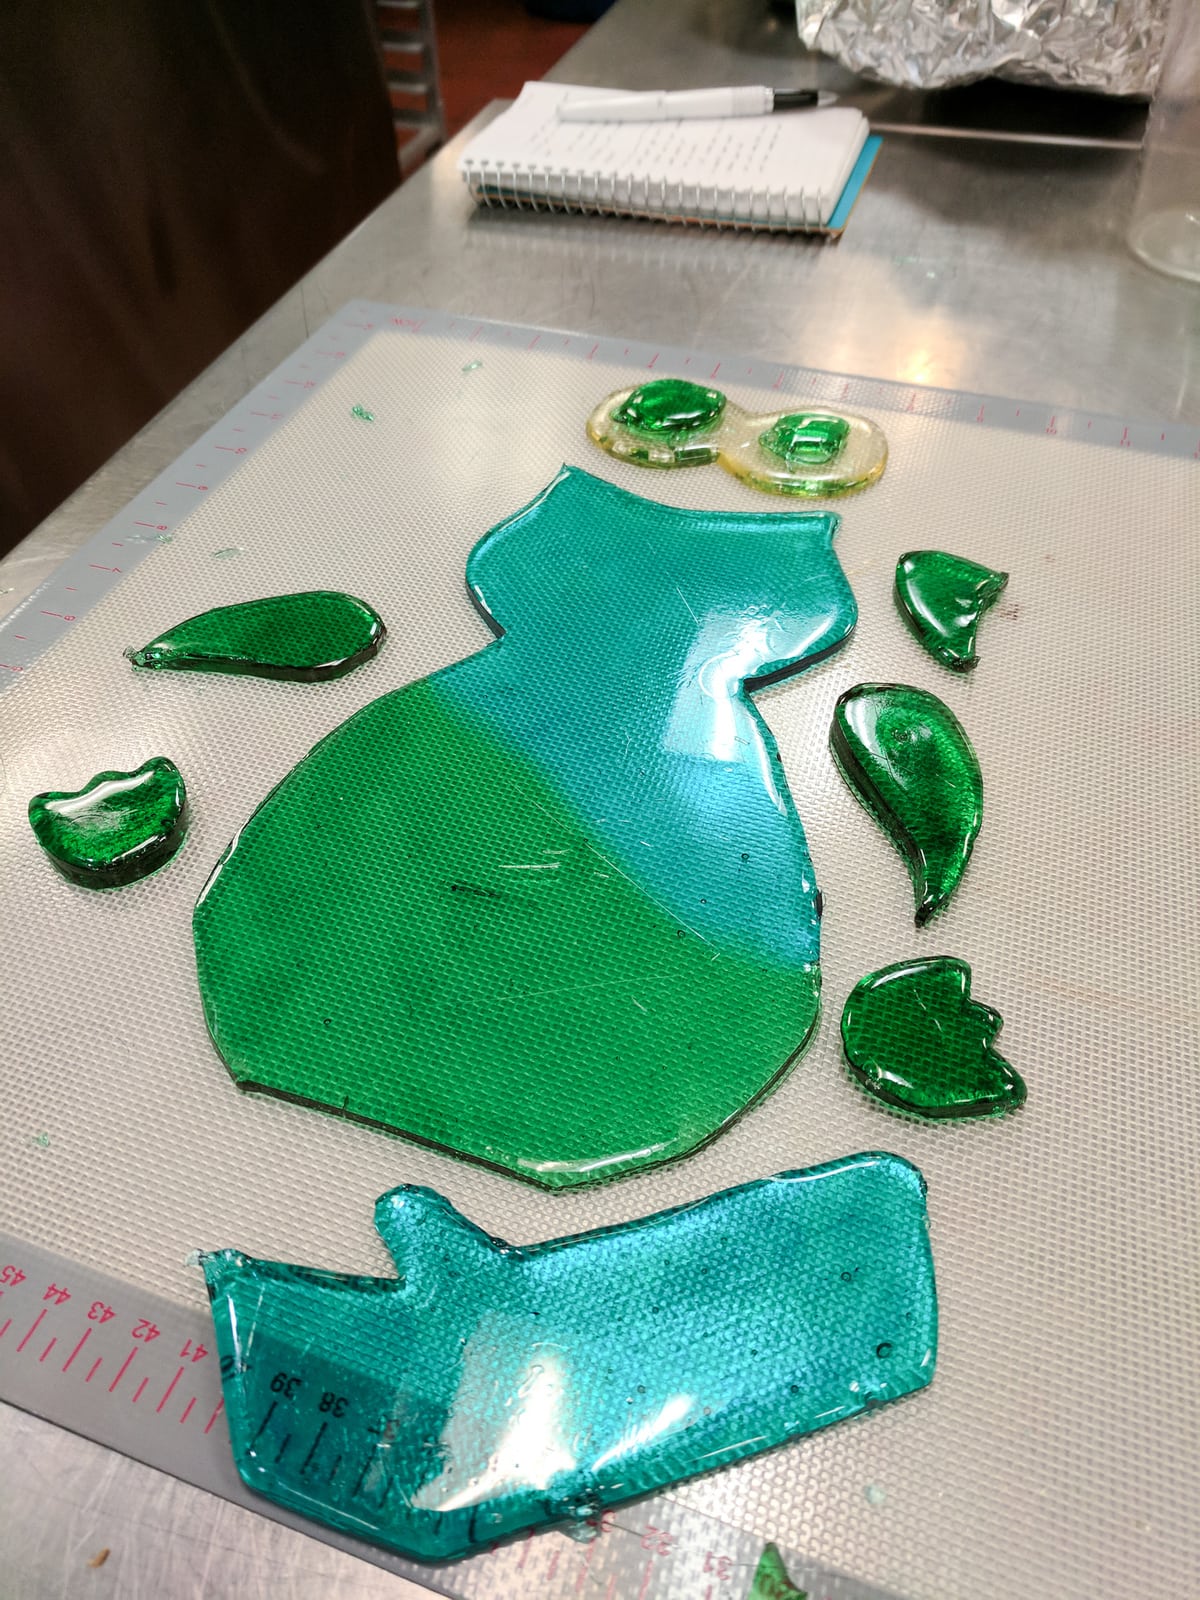
Poured sugar owl pieces before assembly
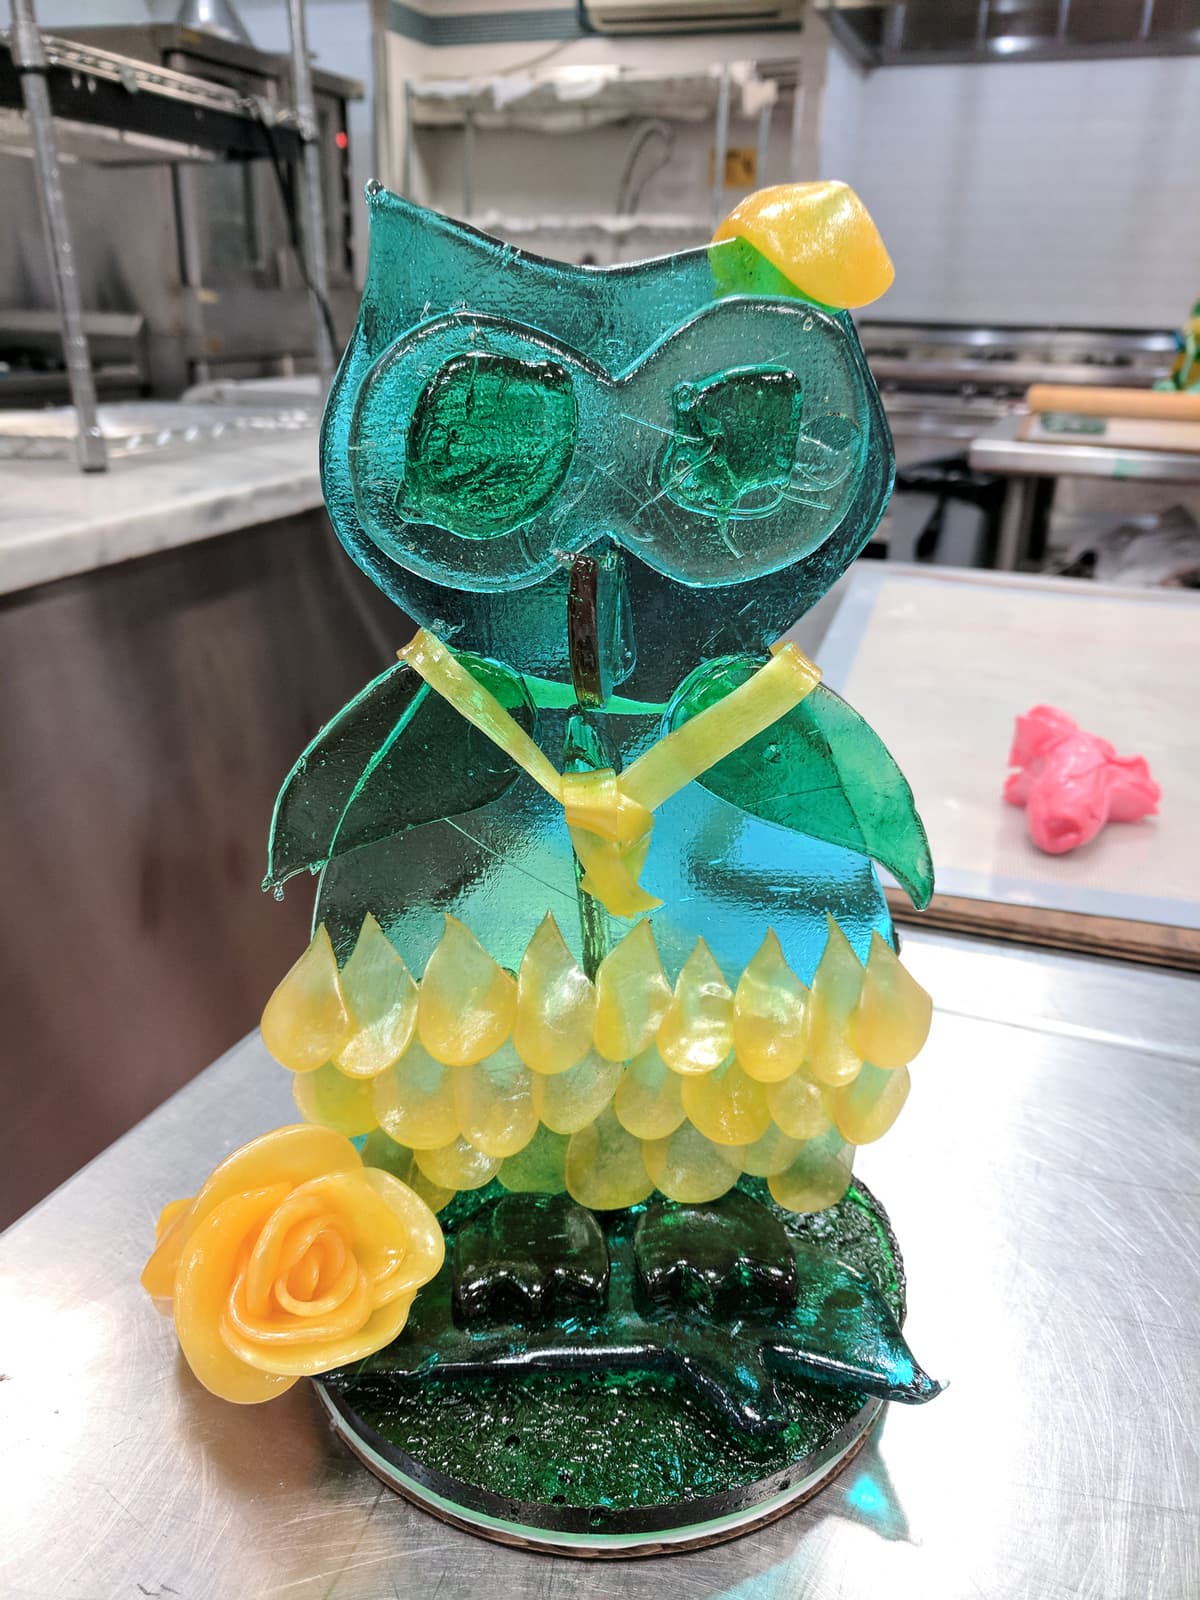
Completed poured sugar owl
After tackling poured sugar, we moved onto pulled sugar. You start off with the same steps as poured sugar but then manipulate it with your hands to make pulled sugar. In other words? You basically burn your hands to make beautiful sugar work. After pouring the sugar onto a silpat, you let it start to harden and then start pulling it with your hands. As you do this, the sugar starts to become very shiny and glossy. You can then manipulate the sugar however you like.
We started by learning how to make sugar flowers and out of pulled sugar. Just making one flower took me like an hour! I also made some feathers that I used to decorate my poured sugar owl.
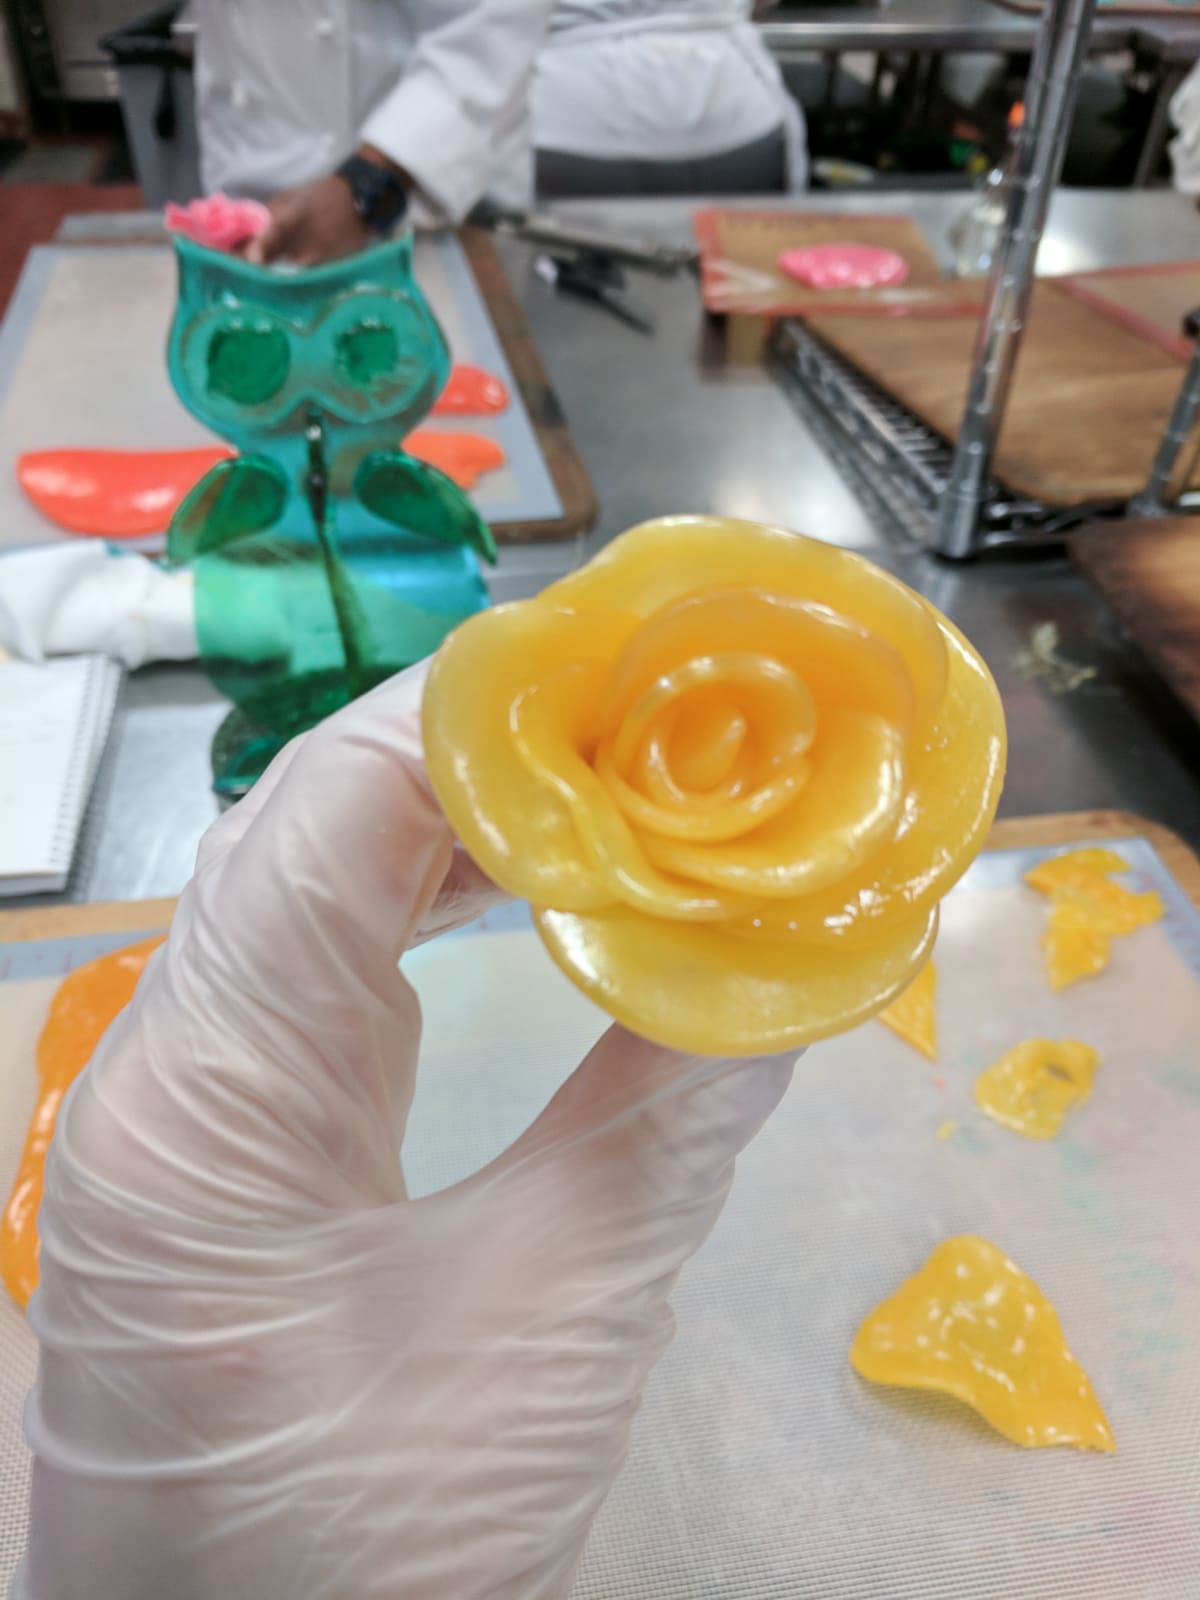
Pulled sugar rose
During another class, we made pulled sugar ribbons. To make these, we alternated various colors of pulled sugar and stretched them very long to make a long strand. Then, we folded the strands and assembled them to make a ribbon. I really love how our ribbon turned out!
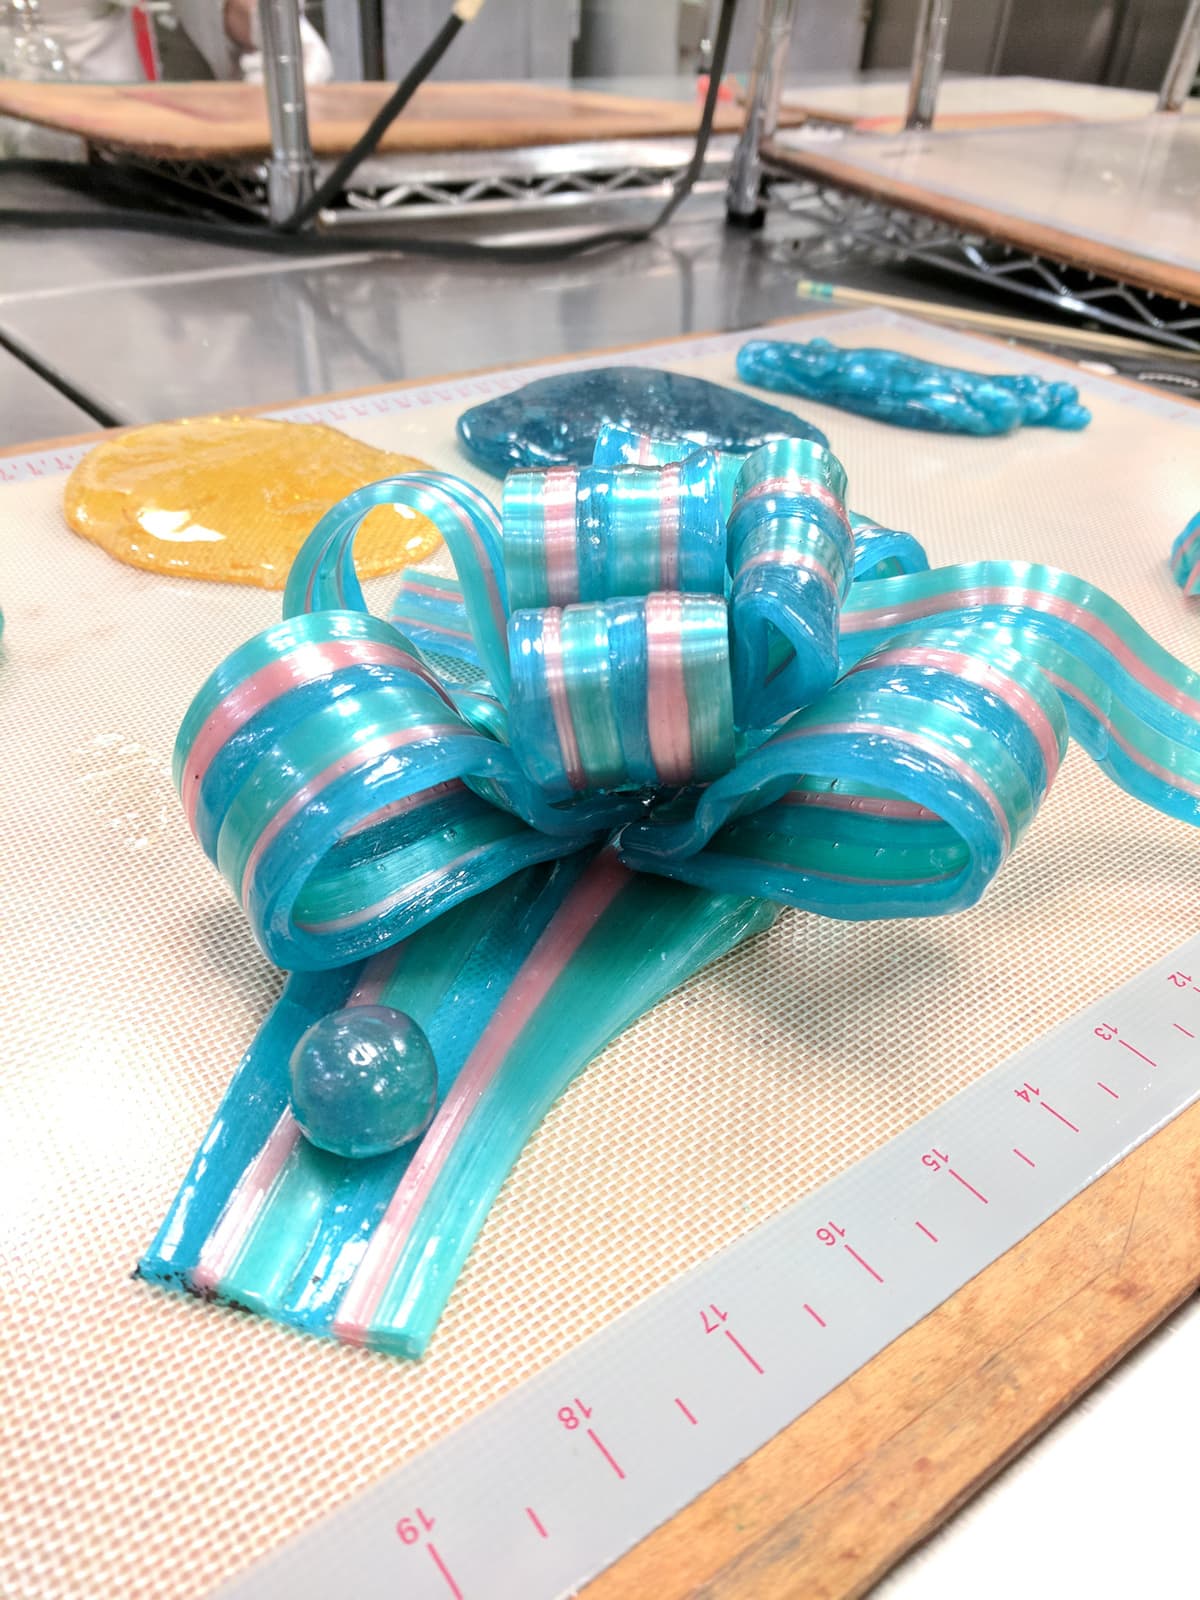
Pulled sugar ribbon
At the end of the unit, we had to make yet another showpiece. Since we did this unit around the time of Halloween, we used that as our theme, and I decided to make a mystical-inspired showpiece. I made a dark backdrop and base out of poured sugar and then crafted a spooky tree out of pastillage. I decorated the tree with pulled sugar leaves, and I attempted to make a crystal ball out of blown sugar (though it didn't turn out quite as good as I had hoped).
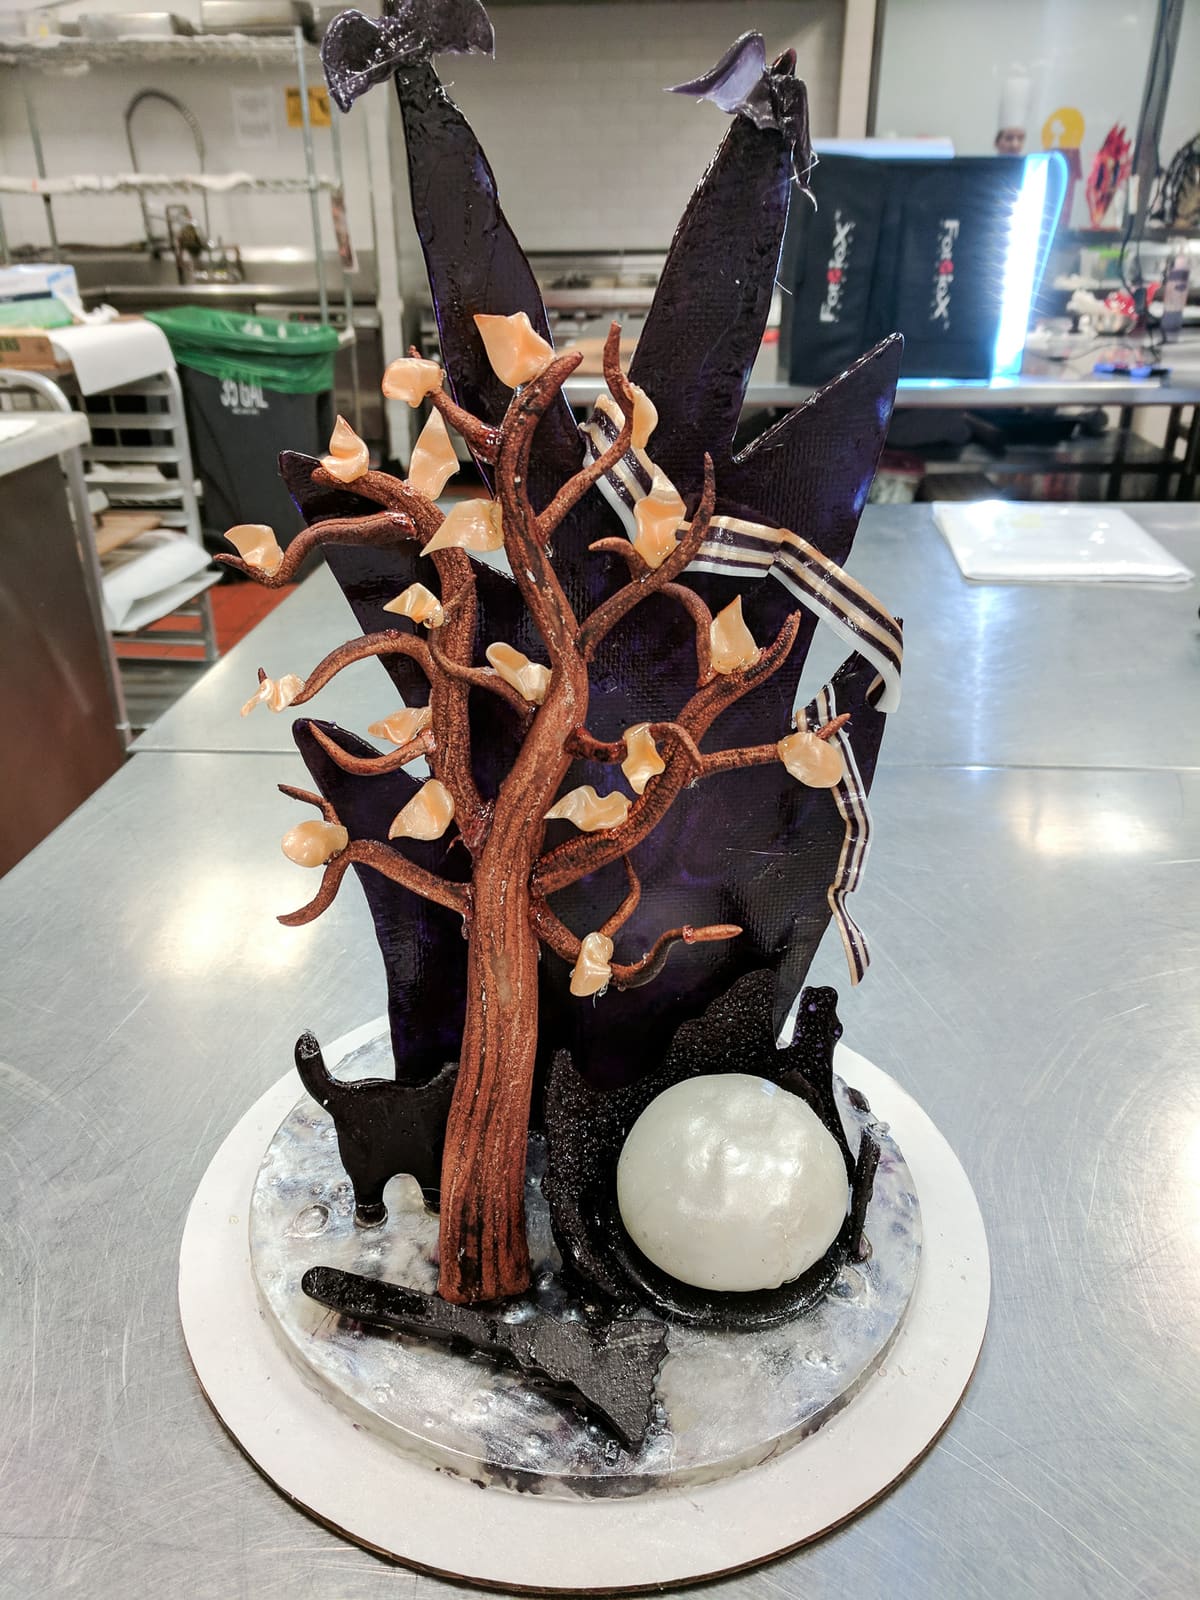
Halloween sugar showpiece
This sugar showpiece really challenged me, and it felt like a race against time to get it finished. Sugar is extremely difficult to work with because of the high temperatures, and factors like humidity make it even more challenging. I am proud of myself for completing this showpiece, and I never thought I would be able to make something like it.
Cake 3
Last but not least, we moved onto our third and final cake unit. We started off simple by continuing to learn how to use fondant. For the first few classes, we did a mystery cake exercise where everyone drew a cake assignment from a hat.
For my assignment, I had to create a cake welcoming an armed forces member home. I decided to use the U.S. Navy as inspiration and used fondant to make an anchor, a rope, and a neckerchief. I also cut out small fondant stars in navy and yellow. For the bottom of the cake, I combined blue and yellow to make marbled fondant to evoke images of the ocean. I think it turned out really nice!
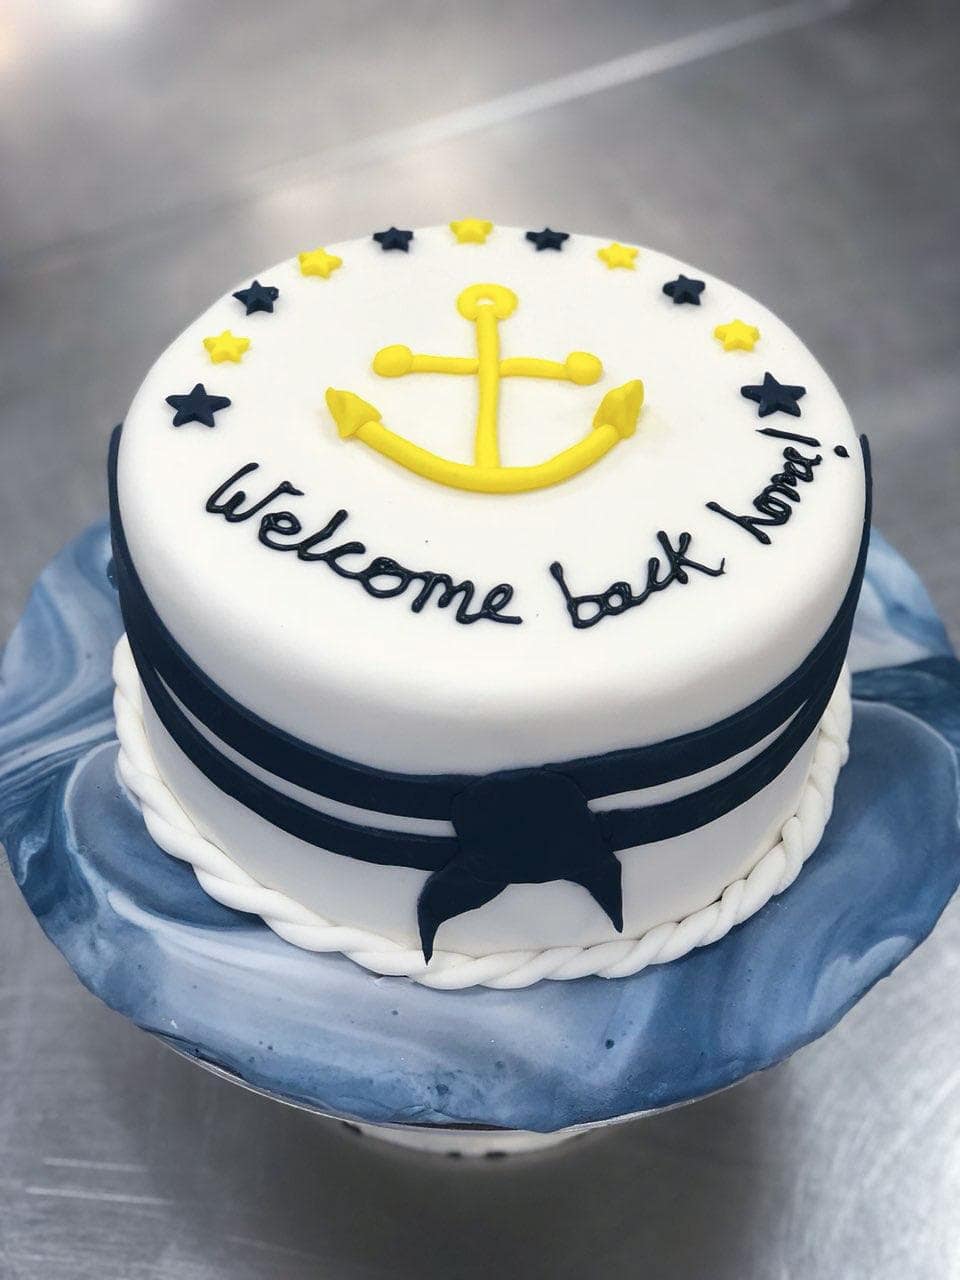
Mystery cake assignment
After wrapping up the mystery cake order, we started the project I had secretly been dreading: the wedding cake. As you read in my previous recap posts, I always found cakes to be challenging, and I didn't want to mess up the wedding cake. By far our most complicated project yet, we had four class periods (around twenty hours) to complete the wedding cake.
For my wedding cake, I had to make a cake for a Scottish wedding using various shades of purple and a specific flower scheme. I decided to make a three-tiered white cake with a purple sash. I made a few roses out of sugar paste to go around the sash, and I piped the Celtic knot symbol around the cake with royal icing.
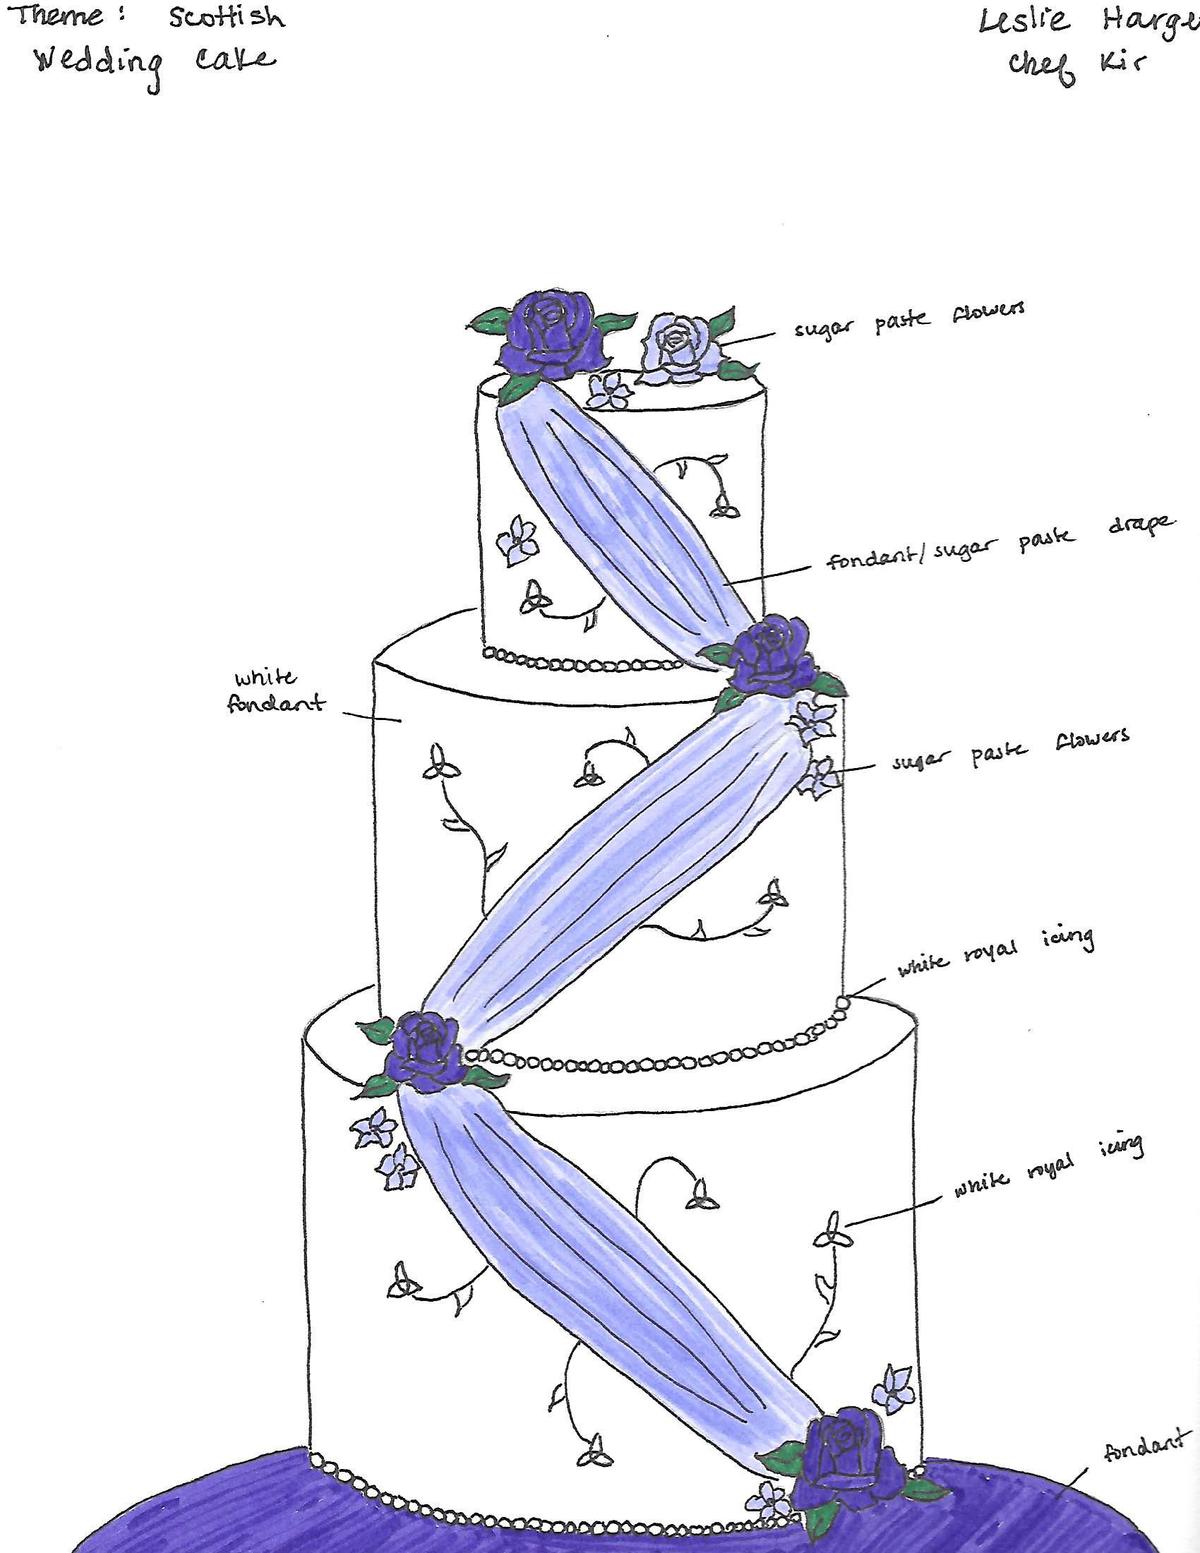
My sketch for the Scottish wedding cake

Scottish wedding cake
Once the cake came together, I really wished that I had made the roses smaller. To me, they felt a bit overbearing and large on the cake, but I didn't have time to make more. For my first wedding cake, though, I thought it turned out way better than expected! The entire process really challenged me, and I have so much respect for wedding cake designers now.
I can't believe there is only one recap post left! During the final post, we will go into the second individual desserts unit and talk all about the exhausting final exam. Thank you so much for keeping up with these recap posts, and if you missed any of the previous recaps, make sure to check them out below.
Pastry School Recap Series
Pastry School Recap #1: Deciding to Go to Pastry School
Pastry School Recap #2: Cookies, Tarts, Pies, and Pȃte à Choux
Pastry School Recap #3: Pâte Feuilletée, Cake 1, Bread, & Viennoiserie
Pastry School Recap #4: Cake 2, Petit Fours, & Midterm Examination
Pastry School Recap #5: Chocolate 1, Individual Desserts 1, & Sugar 1
Pastry School Recap #6: Chocolate 2, Sugar 2, & Cake 3
Pastry School Recap #7: Individual Desserts 2, Restaurant Day, & Final Exam
Comments
No Comments